
Chronograf frequently asked questions (FAQs)
How do I connect Chronograf to an InfluxDB Enterprise cluster?
The connection details form requires additional information when connecting Chronograf to an InfluxDB Enterprise cluster.
When you enter the InfluxDB HTTP bind address in the Connection String input, Chronograf automatically checks if that InfluxDB instance is a data node.
If it is a data node, Chronograf automatically adds the Meta Service Connection URL input to the connection details form.
Enter the HTTP bind address of one of your cluster’s meta nodes into that input and Chronograf takes care of the rest.
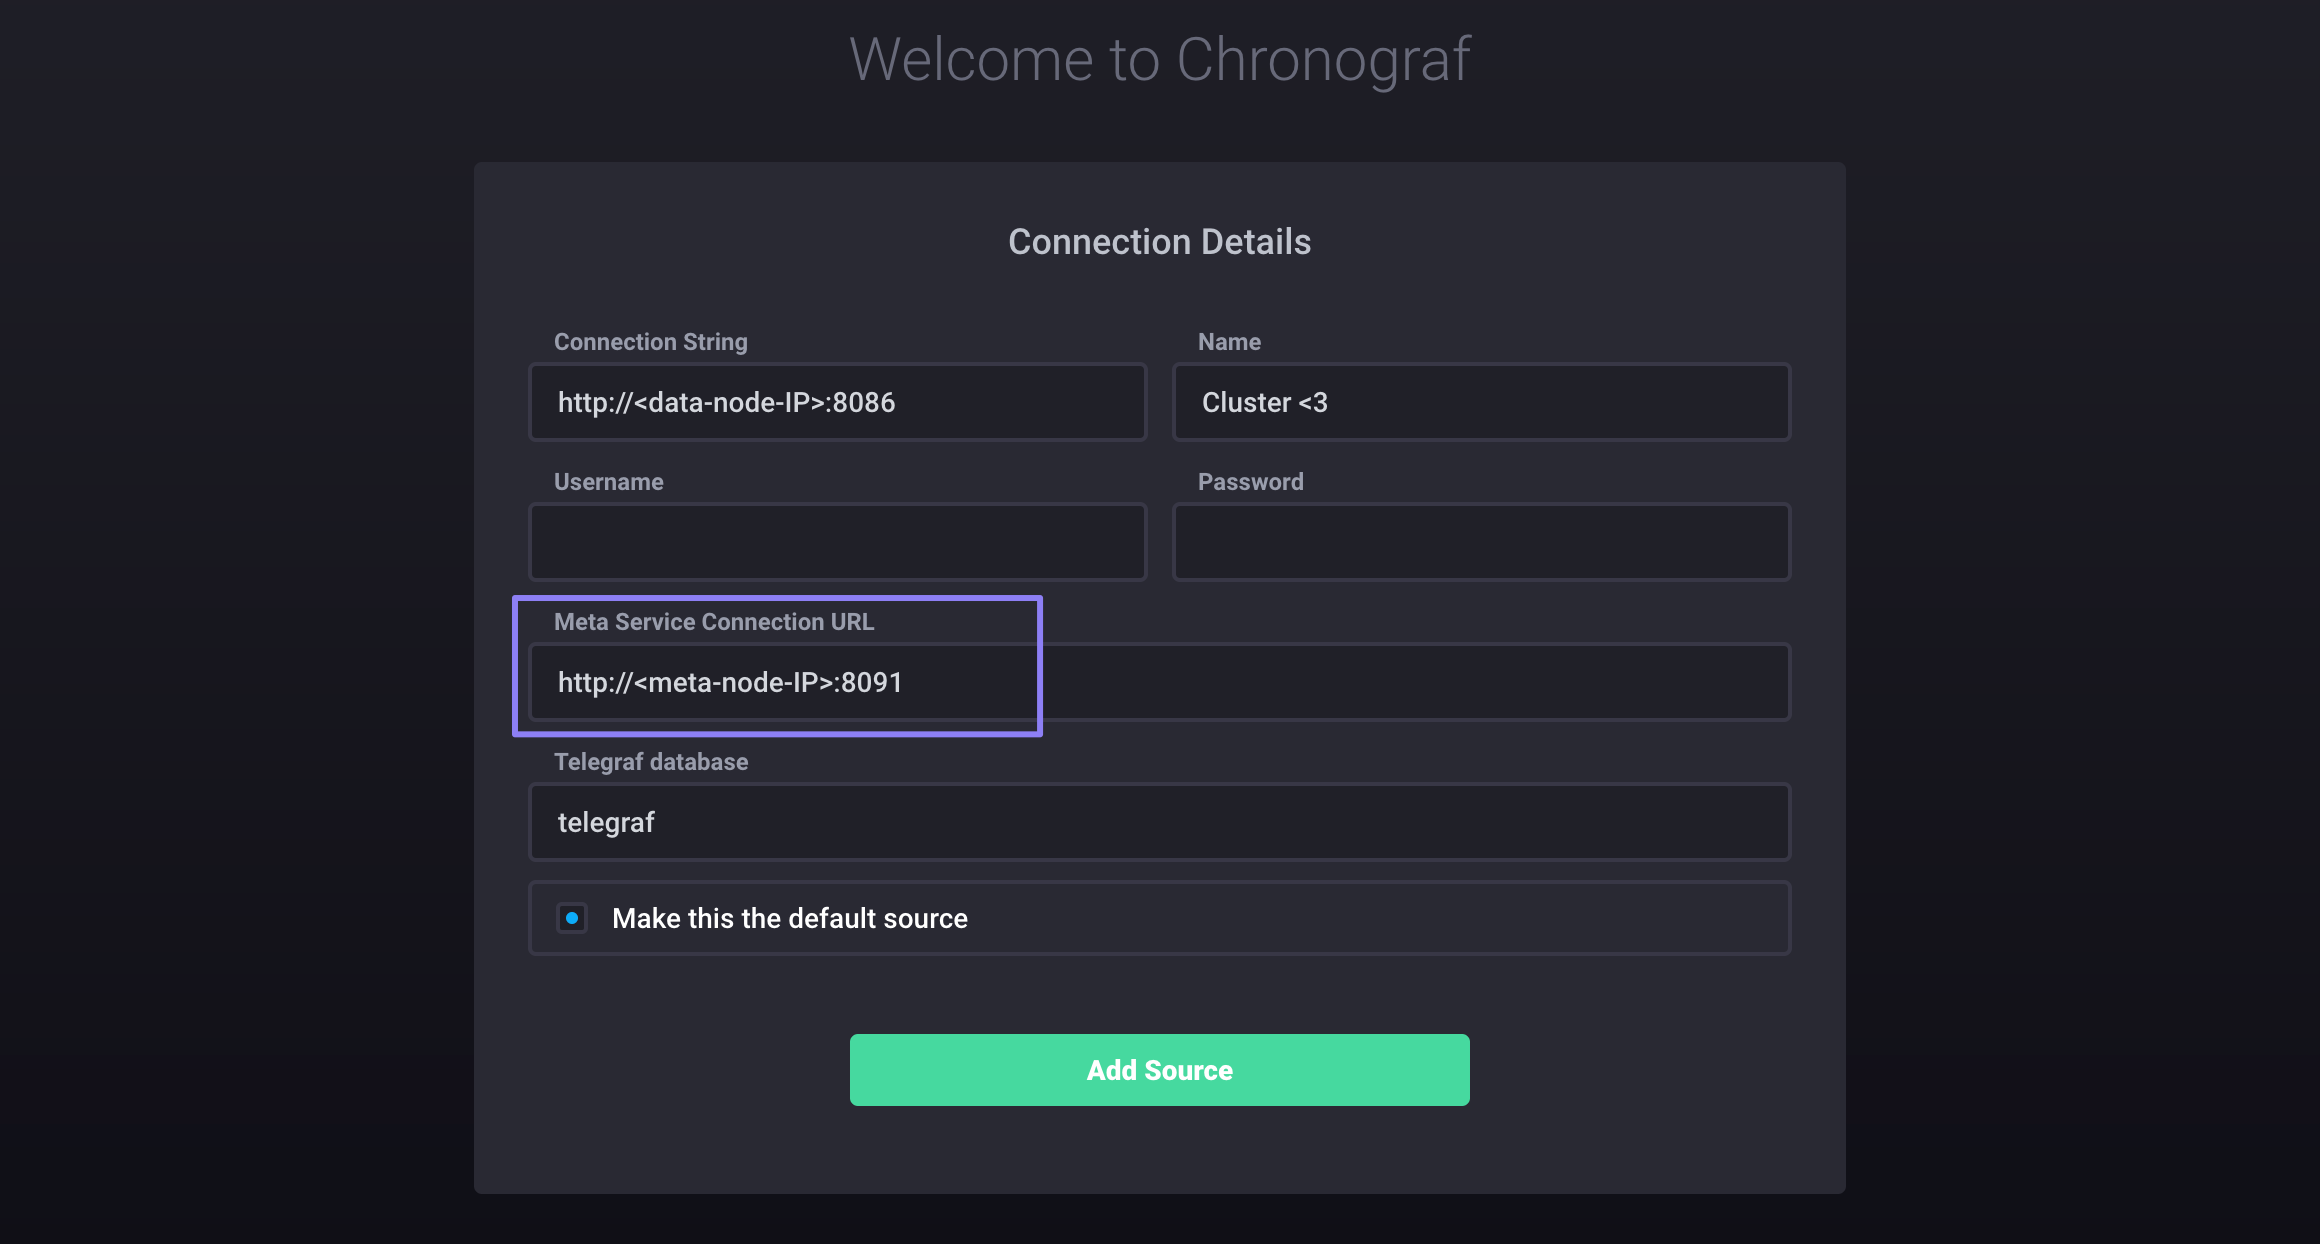
Note that the example above assumes that you do not have authentication enabled. If you have authentication enabled, the form requires username and password information. For more details about monitoring an InfluxDB Enterprise cluster, see the Monitor an InfluxDB Enterprise Cluster guide.
Was this page helpful?
Thank you for your feedback!
Support and feedback
Thank you for being part of our community! We welcome and encourage your feedback and bug reports for Chronograf and this documentation. To find support, use the following resources: