
Revoke a database token
Use the influxctl CLI
or the Management HTTP API
to revoke a database token associated with your
InfluxDB Cloud Dedicated cluster.
The InfluxDB Cloud Dedicated administrative UI includes a portal for creating and managing database tokens.
Administrators can use this portal to:
- View token details
- Add read and write permissions for specific databases to a token
- Edit a token’s existing read and write permissions for a database
- Create a database token
- Revoke a database token
Access the InfluxDB Cloud Dedicated Admin UI at console.influxdata.com. If you don’t have login credentials, contact InfluxData support.
The Database Tokens portal displays the list of database tokens associated with the cluster. Use the sort and filter options above the list to find a specific token.
Click the Options button (three vertical dots) to the right of the token you want to revoke.
In the options menu, click Revoke Token. The Revoke Database Token dialog displays.
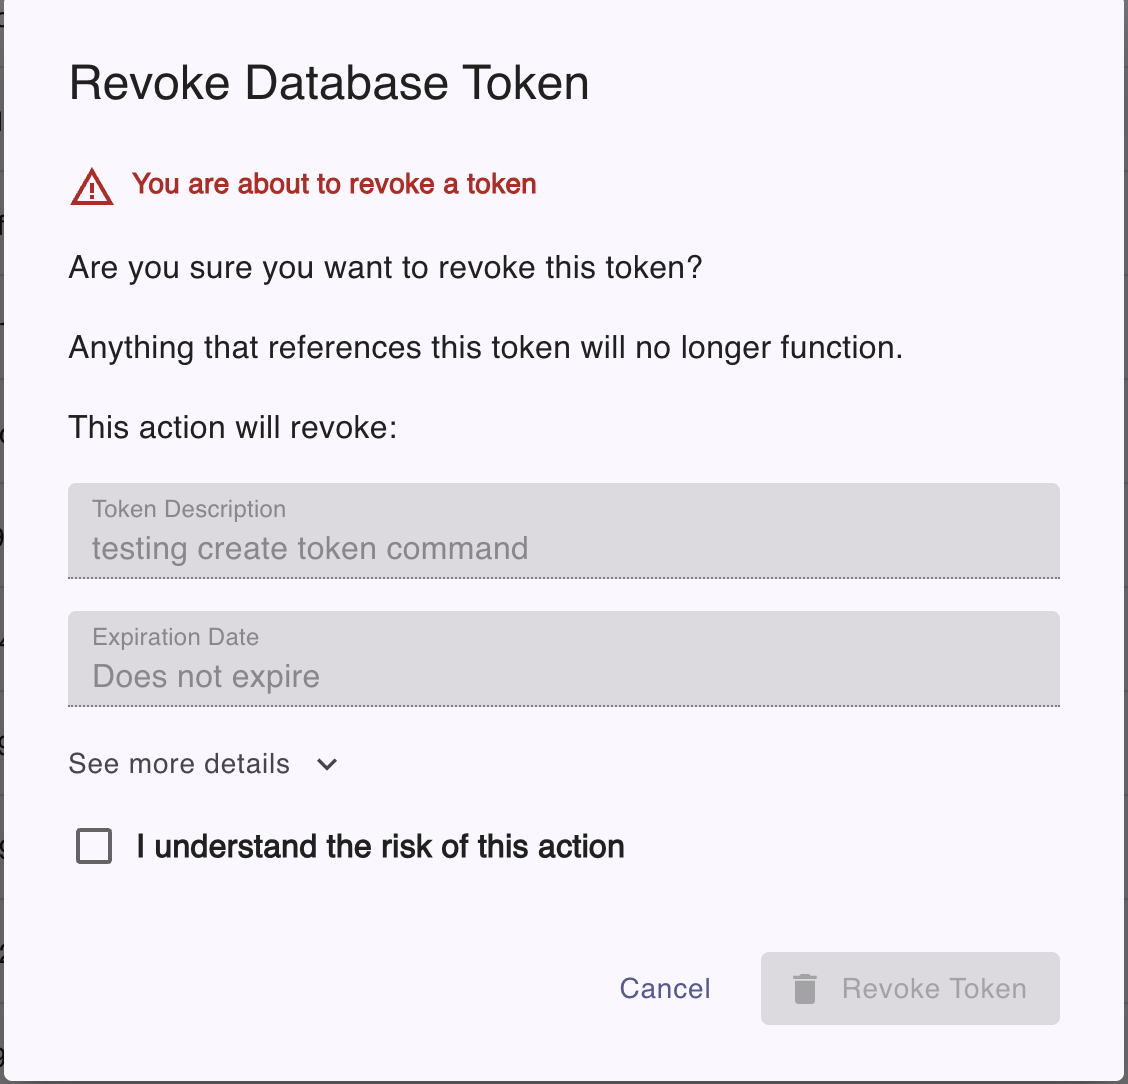
Check the box to confirm that you understand the risk.
Click the Revoke Token button. The token is revoked and filtered from the list of active tokens.
Use the influxctl token revoke command
to revoke a database token and remove all permissions associated with the token.
If you haven’t already, download and install the
influxctlCLI, and then configure aninfluxctlconnection profile for your cluster.To list token IDs, run the
influxctl token listcommand in your terminal.influxctl token listCopy the token ID of the token you want to revoke.
Run the
influxctl token revokecommand and provide the following:- Token ID to revoke
Confirm that you want to revoke the token.
influxctl token revoke TOKEN_IDThis example uses cURL to send a Management HTTP API request, but you can use any HTTP client.
If you haven’t already, follow the instructions to install cURL for your system.
In your terminal, use cURL to send a request to the following InfluxDB Cloud Dedicated endpoint:
DELETE https://console.influxdata.com/api/v0/accounts/ACCOUNT_ID/clusters/CLUSTER_ID/tokens/TOKEN_ID
In the URL, provide the following:
ACCOUNT_ID: The ID of the account that the cluster belongs to (see how to list cluster details).CLUSTER_ID: The ID of the cluster that you want to manage (see how to list cluster details).TOKEN_ID: The ID of the database token that you want to revoke (see how to list token details).
Provide the following request headers:
Accept: application/jsonto ensure the response body is JSON contentAuthorization: Bearerand a Management API token for your cluster (see how to create a management token for Management API requests).
Specify the
DELETErequest method.
The following example shows how to use the Management API to revoke a database token and remove all permissions associated with the token:
curl \
 --location "https://console.influxdata.com/api/v0/accounts/ACCOUNT_ID/clusters/CLUSTER_ID/tokens/TOKEN_ID" \
 --request DELETE \
 --header "Accept: application/json" \
 --header "Authorization: Bearer $MANAGEMENT_TOKEN" \
Replace the following:
ACCOUNT_ID: the ID of the InfluxDB Cloud Dedicated account associated with the token you want to revokeCLUSTER_ID: the ID of the InfluxDB Cloud Dedicated cluster associated with the token you want to revokeMANAGEMENT TOKEN: a management token for your InfluxDB Cloud Dedicated clusterTOKEN_ID: the ID of the database token to revoke
Revoking a token is immediate and cannot be undone
Revoking a database token is a destructive action that takes place immediately and cannot be undone.
Rotate revoked tokens
After revoking a database token, any clients using the revoked token need to be updated with a new database token to continue to interact with your InfluxDB Cloud Dedicated cluster.
Was this page helpful?
Thank you for your feedback!
Support and feedback
Thank you for being part of our community! We welcome and encourage your feedback and bug reports for InfluxDB Cloud Dedicated and this documentation. To find support, use the following resources:
Customers with an annual or support contract can contact InfluxData Support.