
List database tokens
Use the Admin UI, the influxctl CLI,
or the Management HTTP API
to list database tokens in your InfluxDB Cloud Dedicated cluster.
List database tokens
The InfluxDB Cloud Dedicated administrative UI includes a portal for creating and managing database tokens.
Administrators can use this portal to:
- View token details
- Add read and write permissions for specific databases to a token
- Edit a token’s existing read and write permissions for a database
- Create a database token
- Revoke a database token
Access the InfluxDB Cloud Dedicated Admin UI at console.influxdata.com. If you don’t have login credentials, contact InfluxData support.
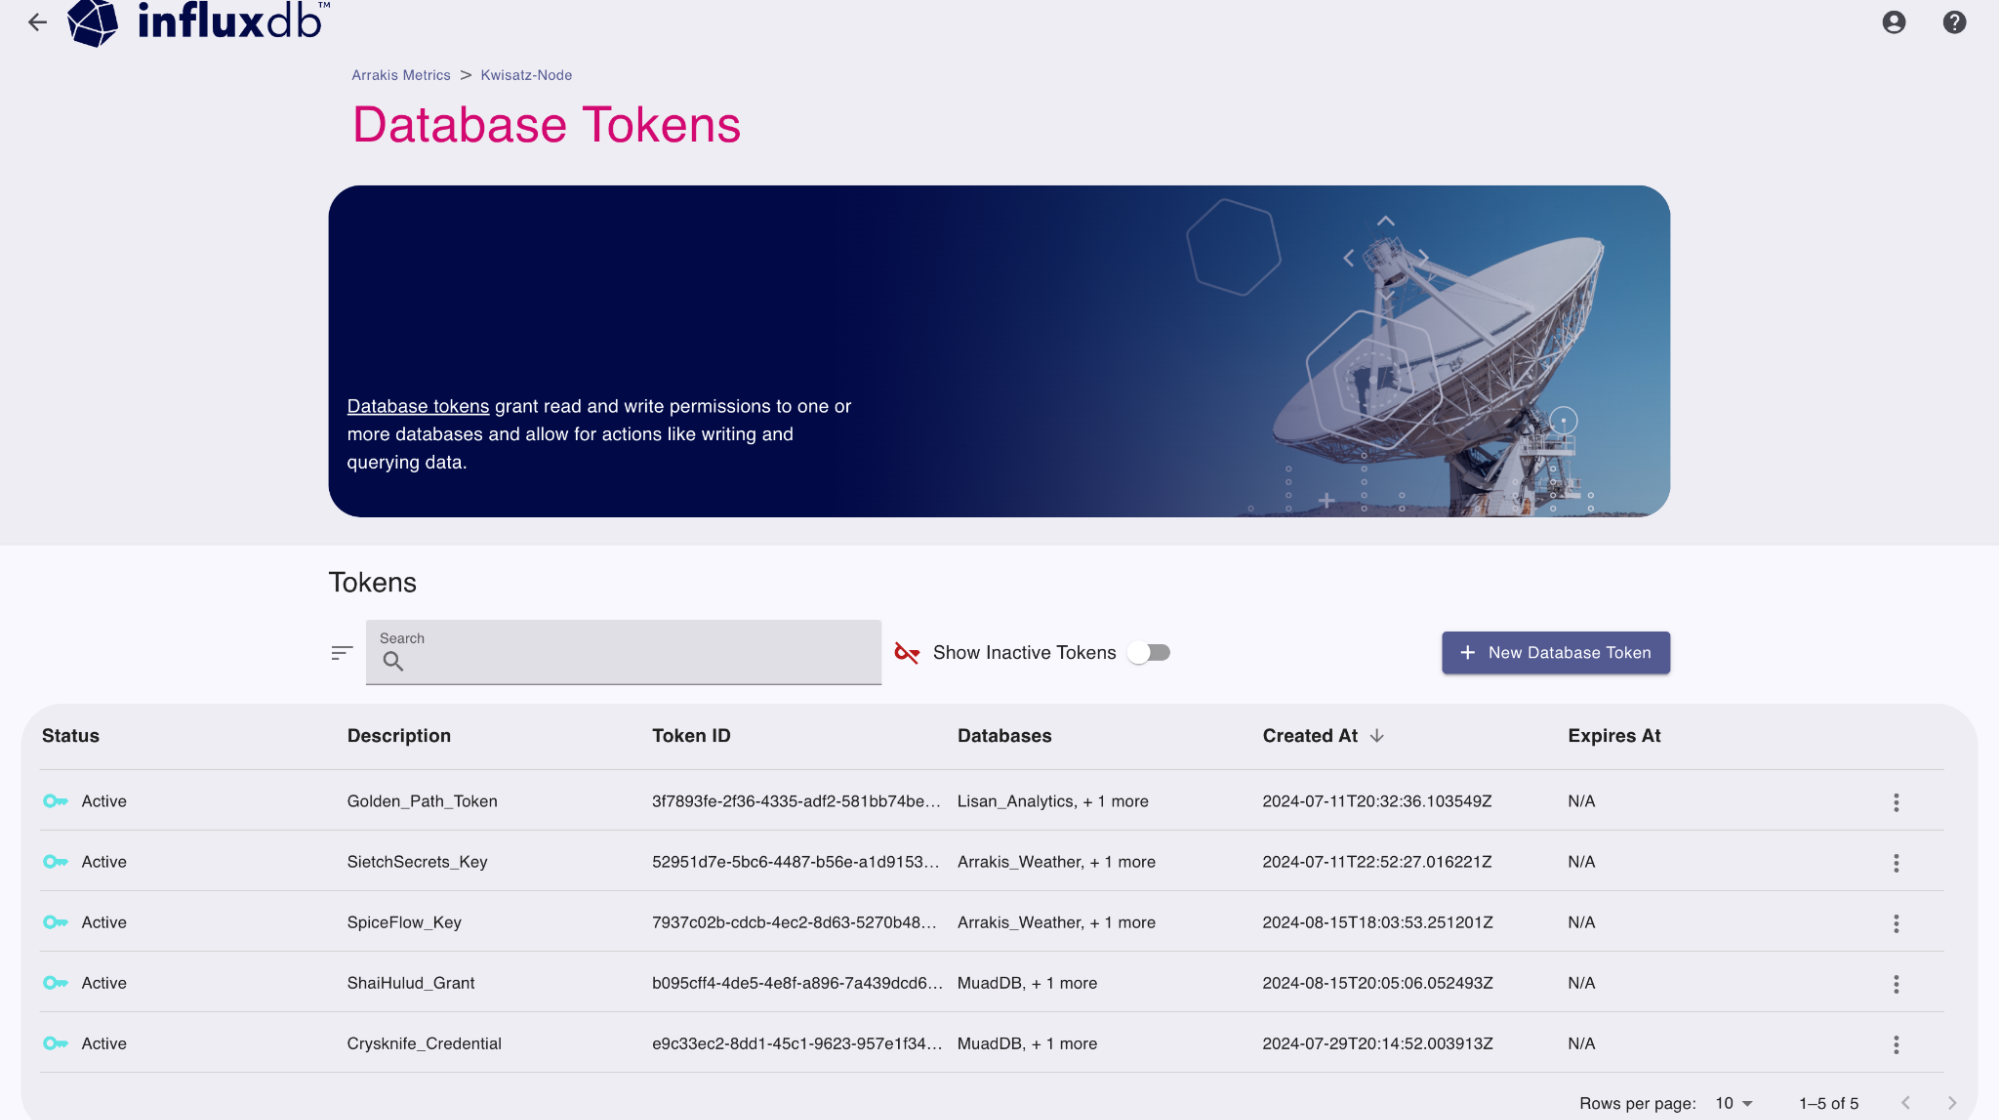
Use the Database Tokens page to manage authentication tokens for database-level operations:
- Create and manage database tokens with granular permissions.
- View token status, descriptions, and associated databases.
- Edit permissions or revoke existing tokens.
- Control access with read and write permissions for specific databases.
- Toggle display of inactive tokens.
The Database Tokens portal lists all database tokens associated with the cluster and provides the following information about each token:
- Token ID
- Description
- Databases
- Status (Active or Revoked)
- Created At date
- Expires At date
You can Search tokens by description or ID to filter the list and use the sort button and column headers to sort the list.
If you haven’t already, download and install the
influxctlCLI, and then configure aninfluxctlconnection profile for your cluster.2. In your terminal, run theinfluxctl token listcommand and provide the following:- Optional: Output format
influxctl token list --format table
This example uses cURL to send a Management HTTP API request, but you can use any HTTP client.
If you haven’t already, follow the instructions to install cURL for your system.
In your terminal, use cURL to send a request to the following InfluxDB Cloud Dedicated endpoint:
GET https://console.influxdata.com/api/v0/accounts/ACCOUNT_ID/clusters/CLUSTER_ID/tokens
In the URL, provide the following credentials:
ACCOUNT_ID: The ID of the account that the cluster belongs to (see how to list cluster details).CLUSTER_ID: The ID of the cluster that you want to manage (see how to list cluster details).
Provide the following request headers:
Accept: application/jsonto ensure the response body is JSON contentAuthorization: Bearerand a Management API token for your cluster (see how to create a management token for Management API requests).
The following example shows how to use the Management API to list database tokens:
curl \
   --location "https://console.influxdata.com/api/v0/accounts/ACCOUNT_ID/clusters/CLUSTER_ID/tokens" \
   --header "Accept: application/json" \
   --header "Authorization: Bearer MANAGEMENT_TOKEN"
Replace the following in your request:
ACCOUNT_ID: the ID of the InfluxDB Cloud Dedicated account to create the database token forCLUSTER_ID: the ID of the InfluxDB Cloud Dedicated cluster to create the database token forMANAGEMENT TOKEN: a management token for your InfluxDB Cloud Dedicated cluster
Retrieve a database token by ID
To retrieve a specific database token by ID, send a request to the following InfluxDB Cloud Dedicated endpoint:
GET https://console.influxdata.com/api/v0/accounts/ACCOUNT_ID/clusters/CLUSTER_ID/tokens/TOKEN_ID
In the URL, provide the following:
ACCOUNT_ID: The ID of the account that the cluster belongs to (see how to list cluster details).CLUSTER_ID: The ID of the cluster that you want to manage (see how to list cluster details).TOKEN_ID: The ID of the database token that you want to retrieve (see how to list token details).
Provide the following request headers:
Accept: application/jsonto ensure the response body is JSON contentAuthorization: Bearerand a Management API token for your cluster (see how to create a management token for Management API requests).
curl \
 --location "https://console.influxdata.com/api/v0/accounts/ACCOUNT_ID/clusters/CLUSTER_ID/tokens/TOKEN_ID" \
 --header "Accept: application/json" \
 --header "Authorization: Bearer MANAGEMENT_TOKEN" \
Replace the following:
ACCOUNT_ID: the ID of the InfluxDB Cloud Dedicated account to create the database token forCLUSTER_ID: the ID of the InfluxDB Cloud Dedicated cluster to create the database token forMANAGEMENT TOKEN: a management token for your InfluxDB Cloud Dedicated clusterTOKEN_ID: a database token ID
Output formats
The influxctl token list command supports two output formats: table and json.
By default, the command outputs the list of tokens formatted as a table.
The Management API outputs JSON format in the response body.
Detailed output in JSON
For additional token details and easier programmatic access to the command output, include --format json
with your command to format the list as JSON.
influxctl token list --format jsonThe output is a JSON array of token objects that include additional fields such as token ID and permissions.
Example output
+--------------------------------------+----------------------+
| ID                                   | DESCRIPTION          |
+--------------------------------------+----------------------+
| 000x0000-000x-0000-X0x0-X0X00000x000 | read/write for mydb1 |
| 000x000X-Xx0X-0000-0x0X-000xX000xx00 | read-only for mydb2  |
| 00XXxXxx-000X-000X-x0Xx-00000xx00x00 | write-only for mydb3  |
+--------------------------------------+----------------------+
[
{
"account_id": "0x0x0x00-0Xx0-00x0-x0X0-00x00XX0Xx0X",
"cluster_id": "X0x0xxx0-0XXx-000x-00x0-0X000Xx00000",
"id": "000x0000-000x-0000-X0x0-X0X00000x000",
"description": "read/write for mydb1",
"permissions": [
{
"id": "00000000-0000-0000-0000-000000000000",
"action": "read",
"resource": "mydb1"
}
],
},
{
"account_id": "0x0x0x00-0Xx0-00x0-x0X0-00x00XX0Xx0X",
"cluster_id": "X0x0xxx0-0XXx-000x-00x0-0X000Xx00000",
"id": "000x000X-Xx0X-0000-0x0X-000xX000xx00",
"description": "read-only for mydb2",
"permissions": [
{
"id": "00000000-0000-0000-0000-000000000000",
"action": "read",
"resource": "mydb2"
}
],
},
{
"account_id": "0x0x0x00-0Xx0-00x0-x0X0-00x00XX0Xx0X",
"cluster_id": "X0x0xxx0-0XXx-000x-00x0-0X000Xx00000",
"id": "00XXxXxx-000X-000X-x0Xx-00000xx00x00",
"description": "write-only for mydb3",
"permissions": [
{
"id": "00000000-0000-0000-0000-000000000000",
"action": "read",
"resource": "mydb3"
}
],
}
]Was this page helpful?
Thank you for your feedback!
Support and feedback
Thank you for being part of our community! We welcome and encourage your feedback and bug reports for InfluxDB Cloud Dedicated and this documentation. To find support, use the following resources:
Customers with an annual or support contract can contact InfluxData Support.