
Invite a new user
Telegraf Controller is in Public Beta
Telegraf Controller is in public beta and will be part of the future Telegraf Enterprise offering. While in beta, Telegraf Controller is not meant for production use. The Telegraf Controller documentation is a work in progress, and we are actively working to improve it. If you have any questions or suggestions, please submit an issue. We welcome any and all contributions.
Owners and administrators can invite new users to Telegraf Controller by generating an invite link with a pre-assigned role and expiration. The invited user opens the link, sets a password, and their account is immediately active.
You must have the Owner or Administrator role to create invites.
Create an invite
- Navigate to the Users page.
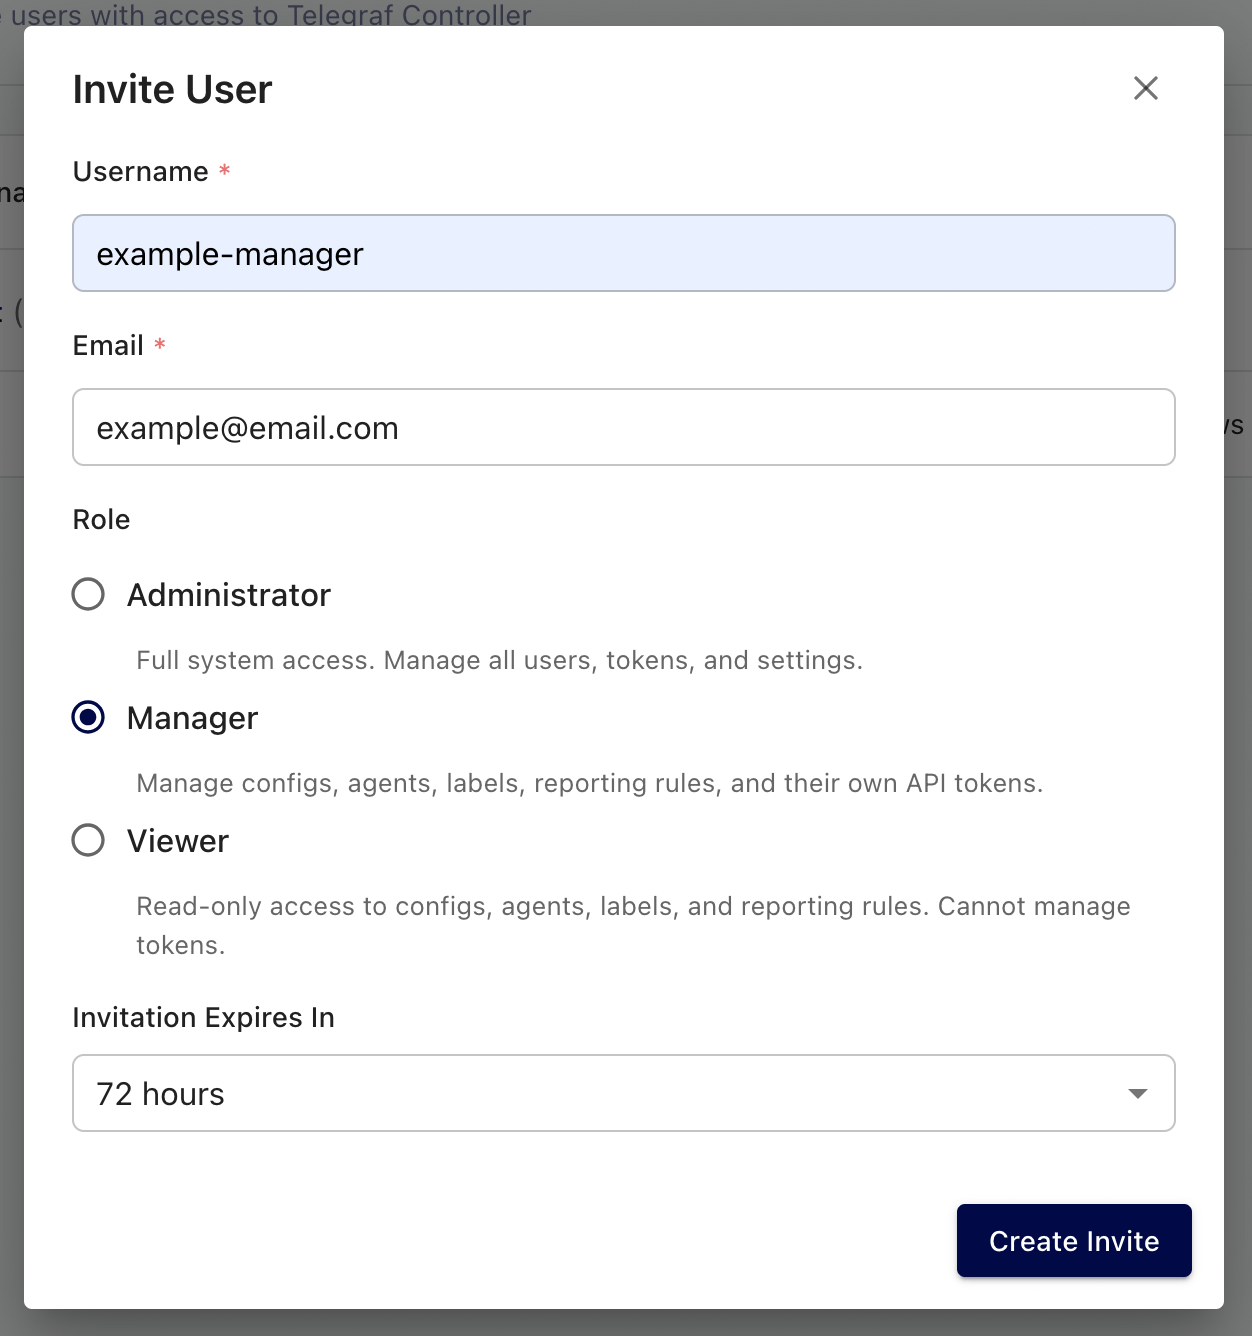
- Click the Invite User button.
- Enter a Username for the new user (3–50 characters).
- Enter the user’s Email address.
- Select a Role for the new user:
- Administrator – full access to all resources and user management.
- Manager – can manage configurations, agents, and labels but cannot manage users.
- Viewer – read-only access to all resources.
- Set the invite Expiration in hours. The default is 72 hours. Valid values range from 1 to 720 hours (30 days).
- Click Create Invite.
You cannot invite a user with the Owner role. To make someone the owner, first invite them as an Administrator, then transfer ownership.
Share the invite link
After creating the invite, Telegraf Controller displays a unique invite link. Copy the link and share it with the user through your preferred communication channel (email, chat, etc.).
The link expires after the duration you configured. Once expired, the link can no longer be used and you must create a new invite.
Accept an invite
The invited user completes the following steps to activate their account:
- Open the invite link in a browser.
- Set a password that meets the configured complexity requirements.
- Click Create Account.
The account activates immediately and the user is automatically logged in with the role assigned during the invite.
Manage pending invites
You can view and manage all pending invites from the Users page. Pending invites appear in a separate list above active users.
To revoke a pending invite before it is used:
- Navigate to the Users page.
- Locate the pending invite you want to remove.
- Click the Delete button next to the invite.
- Confirm the deletion when prompted.
Deleting a pending invite invalidates the invite link. The invited user can no longer use it to create an account.
Was this page helpful?
Thank you for your feedback!
Support and feedback
Thank you for being part of our community! We welcome and encourage your feedback and bug reports for Telegraf and this documentation. To find support, use the following resources:
Customers with an annual or support contract can contact InfluxData Support.