
Manage settings
Owners and administrators can configure public endpoints, login security, and password requirements for Telegraf Controller.
Navigate to the Settings page from the left navigation menu to view and modify these settings.
Public endpoints
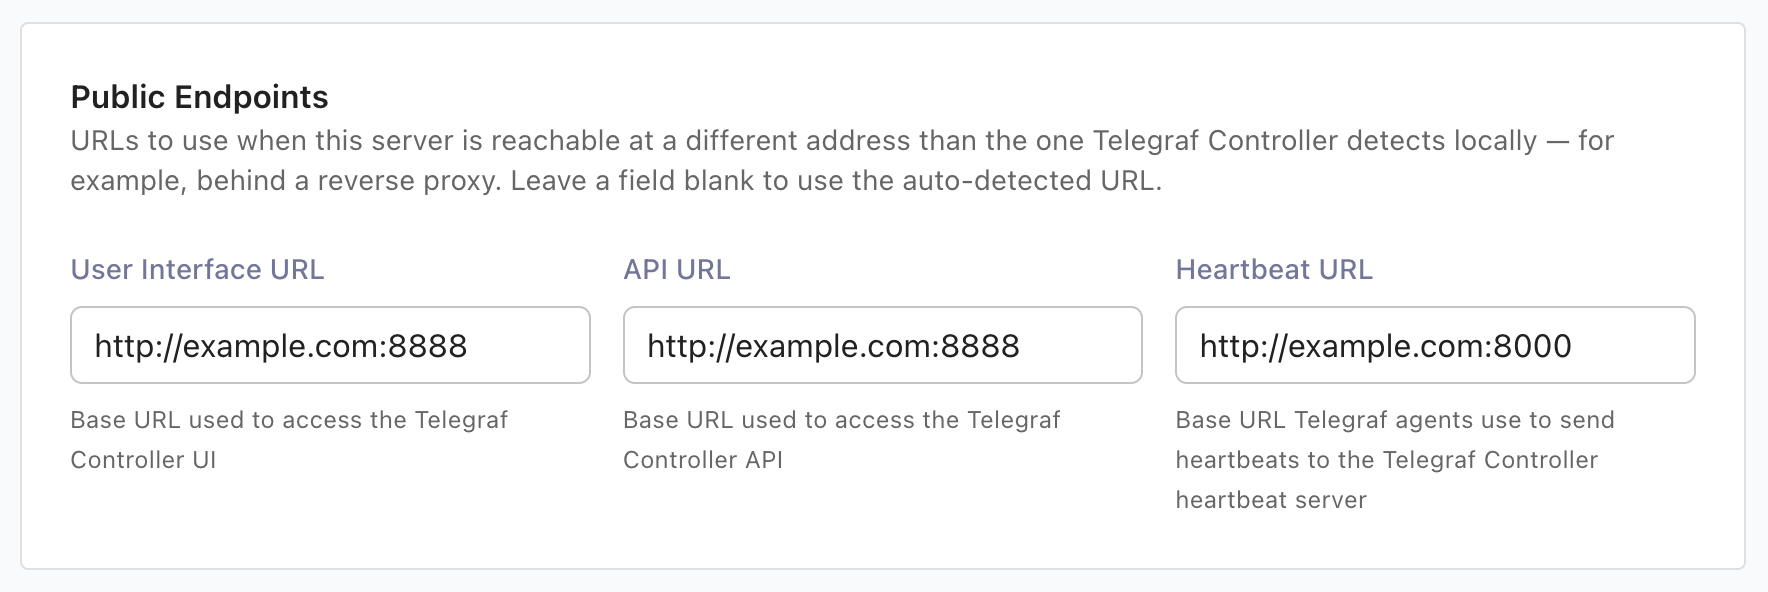
The Public Endpoints section at the top of the Settings page lets owners and administrators set the base URLs that Telegraf Controller shows to users and agents. These are display-only values: Telegraf Controller stores and returns them, but does not bind to or resolve them. Set a public endpoint when the server is reachable at a different address than the one Telegraf Controller detects locally, for example when it runs behind a reverse proxy. Leave a field blank to use the auto-detected URL.
| Setting | Description | Auto-detected fallback |
|---|---|---|
| User Interface URL | Base URL used to access the Telegraf Controller web interface. Used to build user invite links. | Browser origin |
| API URL | Base URL used to access the Telegraf Controller API. Shown in the configuration builder and agent commands. | Browser origin |
| Heartbeat URL | Base URL Telegraf agents use to send heartbeats to the Telegraf Controller heartbeat server. Applied when you add a heartbeat output to a config. | Host address with the heartbeat port |
Each URL must be an absolute URL that includes a scheme and host (for example,
https://telegraf.example.com), must not end with a trailing slash, and can be
at most 2048 characters.
To set a public endpoint:
Navigate to the Settings page.
In the Public Endpoints section, enter a URL for User Interface URL, API URL, or Heartbeat URL.
Click Save.
Login security
Login attempts
You can configure the number of failed login attempts allowed before an account is locked out. The default threshold is 5 attempts, with a minimum of 1.
To change the login attempt threshold:
- Navigate to the Settings page.
- Update the Login attempts value.
- Click Save.
Login lockout
When a user exceeds the failed attempt threshold, their account is locked for a configurable duration. The default lockout duration is 15 minutes, with a minimum of 1 minute. The lockout clears automatically after the configured duration has elapsed.
To change the lockout duration:
- Navigate to the Settings page.
- Update the Login lockout duration value.
- Click Save.
If a user is locked out, an owner or administrator can reset their password to unlock the account.
Password complexity requirements
Telegraf Controller provides three password complexity levels that apply to all password operations, including initial setup, password changes, password resets, and invite completion.
| Level | Min length | Uppercase* | Lowercase* | Digits* | Special characters* |
|---|---|---|---|---|---|
| Low | 8 | No | No | No | No |
| Medium | 10 | Yes | Yes | Yes | No |
| High | 12 | Yes | Yes | Yes | Yes |
* Passwords require at least one of the defined character types.
To change the password complexity level:
- Navigate to the Settings page.
- Select the desired Password complexity level.
- Click Save.
Changing the password complexity level does not affect existing passwords. The new requirements apply only when users set or change their passwords.
Environment variables
You can set initial defaults for login security settings using environment variables. These values are applied when Telegraf Controller initializes its settings for the first time. Changes made on the Settings page override initialized settings.
| Environment variable | Description | Default |
|---|---|---|
LOGIN_LOCKOUT_ATTEMPTS | Failed attempts before lockout | 5 |
LOGIN_LOCKOUT_MINUTES | Minutes to lock account | 15 |
PASSWORD_COMPLEXITY | Complexity level (low, medium, high) | low |
For detailed descriptions and bootstrap behavior, see the Authentication and security section in the configuration options reference.
LDAP authentication
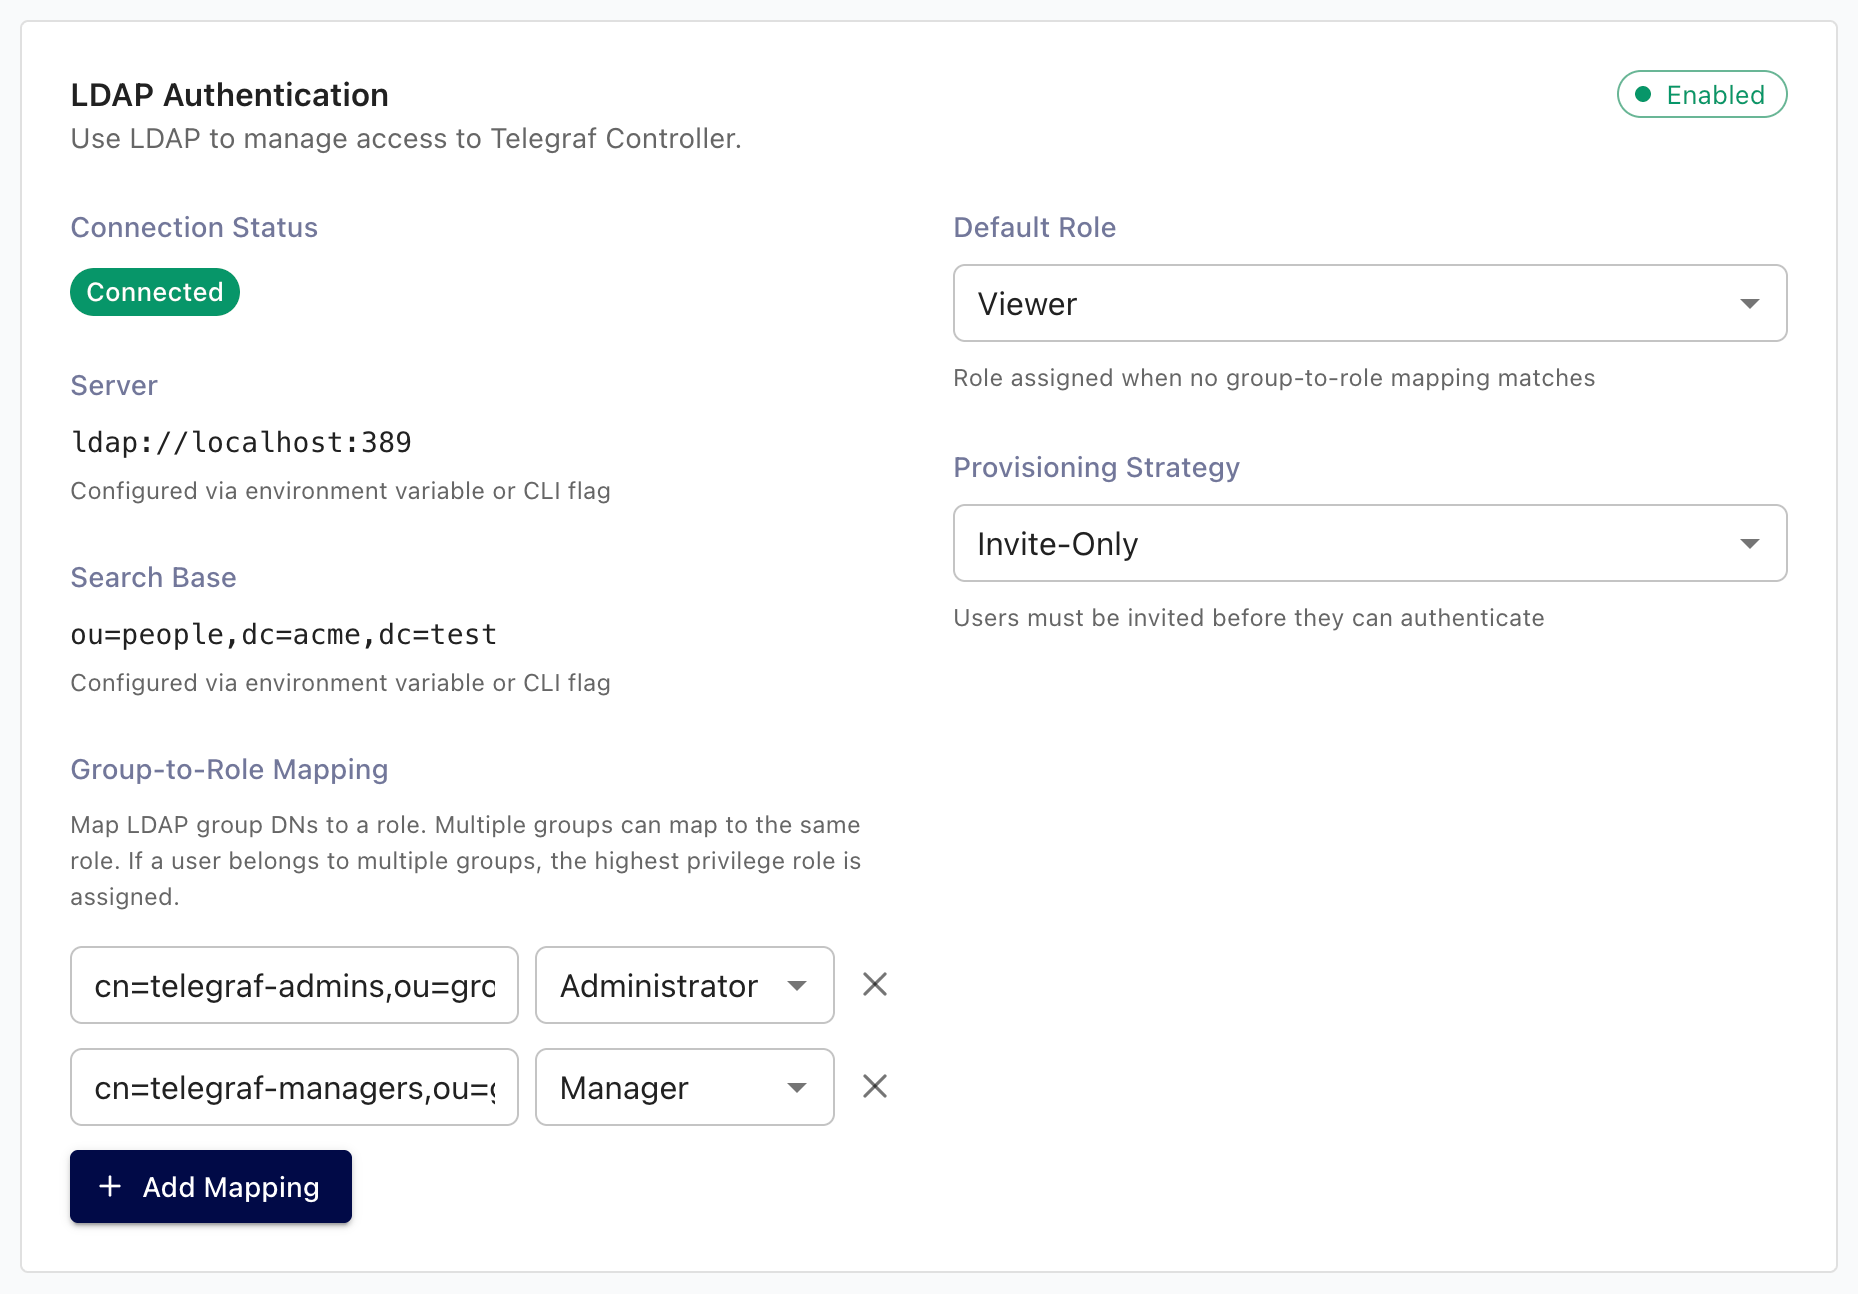
When LDAP authentication is enabled at startup, the LDAP Authentication section on the Settings page lets the owner review the active LDAP configuration and tune how external identities map to Telegraf Controller accounts.
LDAP authentication requires a Telegraf Enterprise license. For setup instructions, see Configure LDAP authentication.
The section displays:
- A read-only summary of the LDAP server URL, bind DN, user search base, TLS settings, and attribute mappings. These values are environment-only and can be changed only by restarting Telegraf Controller.
- Runtime-editable provisioning controls described in the table below.
| Setting | Description |
|---|---|
| Provisioning strategy | invite_only, domain_restricted, or auto_create. See Provisioning strategies. |
| Default role | Role assigned when no group mapping matches an authenticated user. |
| Allowed email domains | Comma-separated list of domains, used when Provisioning strategy is domain_restricted. |
| Auto-link by verified email | When enabled, link an LDAP user to an existing local user with a matching email address. |
| On no group match | use_default_role admits the user with the default role; reject denies the sign-in. |
| Group role mappings | List of (provider ID, group name, role) rows that map directory groups to Telegraf Controller roles. |
To update LDAP settings:
- Sign in as the Owner.
- Navigate to the Settings page.
- In the LDAP Authentication section, update the values.
- Click Save.
OIDC authentication
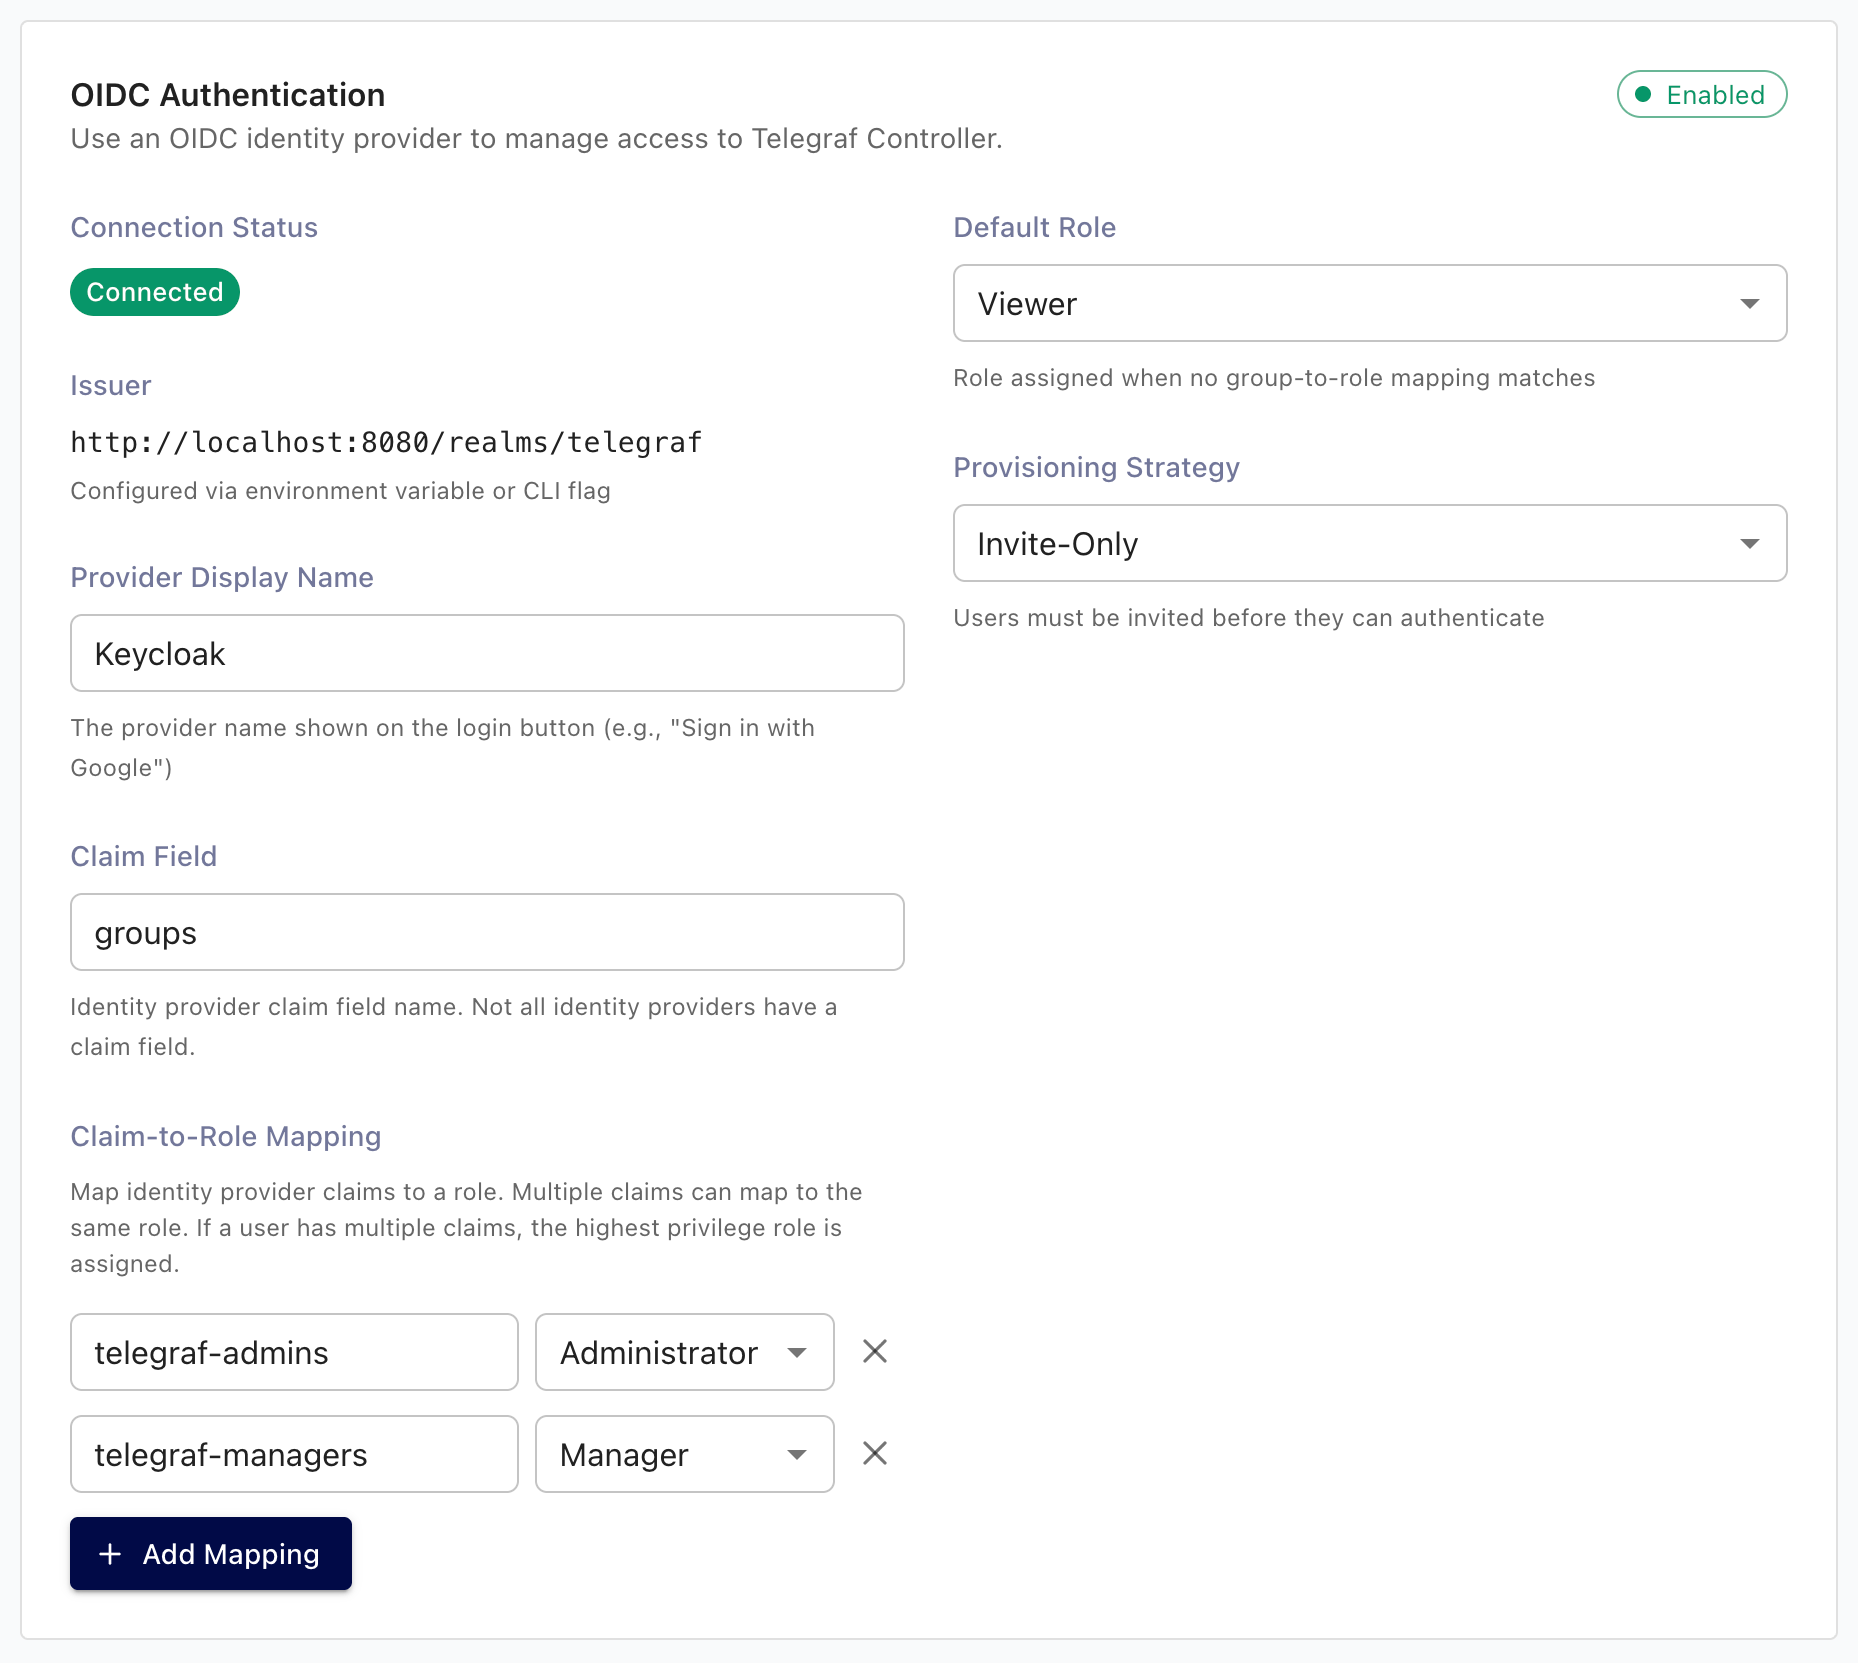
When OIDC authentication is enabled at startup, the OIDC Authentication section on the Settings page lets the owner review the active OIDC configuration and tune how external identities map to Telegraf Controller accounts.
OIDC authentication requires a Telegraf Enterprise license. For setup instructions, see Configure OIDC authentication.
The section displays:
- A read-only summary of the issuer, client ID, redirect URI, scopes, and username claim, plus the provider discovery status. These values are environment-only and can be changed only by restarting Telegraf Controller.
- Runtime-editable provisioning controls described in the table below.
| Setting | Description |
|---|---|
| Provisioning strategy | invite_only, domain_restricted, or auto_create. See Provisioning strategies. |
| Default role | Role assigned when no group mapping matches an authenticated user. |
| Allowed email domains | Comma-separated list of domains, used when Provisioning strategy is domain_restricted. |
| Auto-link by verified email | When enabled, link an OIDC user to an existing local user whose email is verified and matches. |
| On no group match | use_default_role admits the user with the default role; reject denies the sign-in. |
| Display name | Overrides the startup-time AUTH_OIDC_DISPLAY_NAME on the sign-in button. |
| Groups claim | Overrides the startup-time AUTH_OIDC_GROUPS_CLAIM for incoming tokens. |
| Group role mappings | List of (provider ID, group name, role) rows that map OIDC group values to Telegraf Controller roles. |
To update OIDC settings:
- Sign in as the Owner.
- Navigate to the Settings page.
- In the OIDC Authentication section, update the values.
- Click Save.
Audit logging
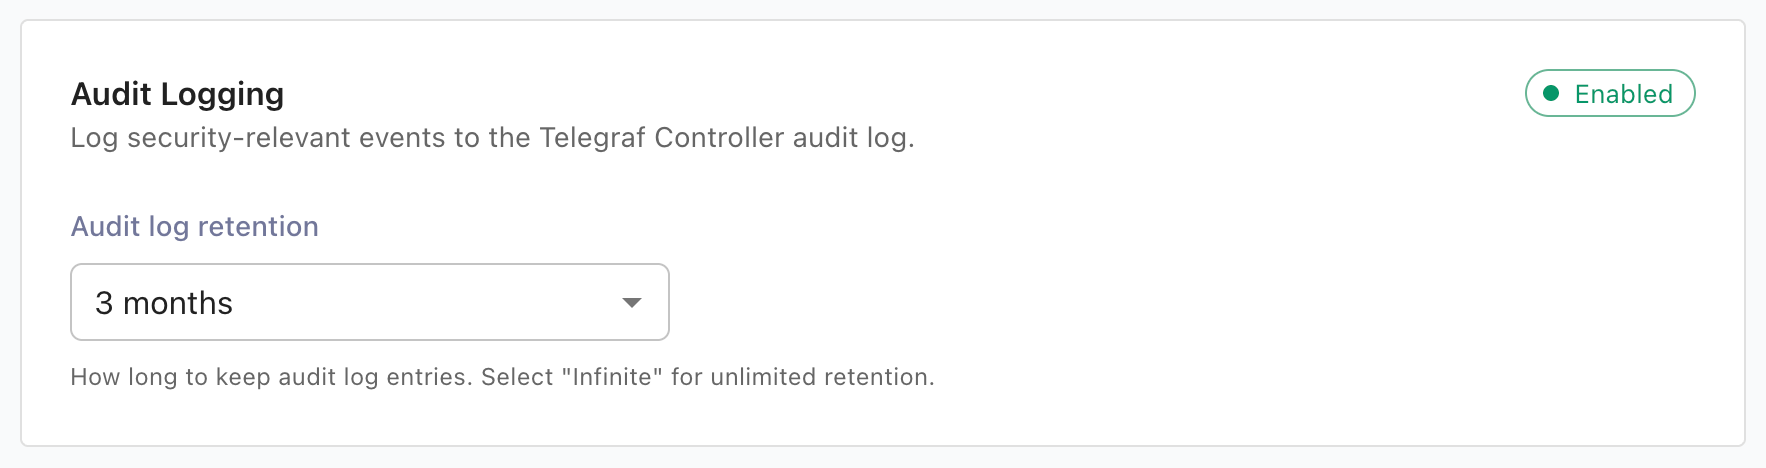
When audit logging is enabled, the Settings page lets you change the retention period for audit entries. The default retention is 90 days (2160 hours), and available values range from 30 days to 2 years or infinite.
Audit logging itself is enabled at startup only and requires a Telegraf Enterprise license. For details, see Enable and configure audit logging.
To change the audit log retention period:
- Navigate to the Settings page.
- In the Audit Logging section, select a value from Audit log retention.
- Click Save.
Enterprise licensing
License management for Telegraf Controller lives at Settings > Enterprise. Owners can view the current Telegraf Enterprise license, upload a new license, and remove a license. All users see current entitlements and usage.
For details on applying, replacing, and removing a license, see Manage your license.
Was this page helpful?
Thank you for your feedback!
Support and feedback
Thank you for being part of our community! We welcome and encourage your feedback and bug reports for Telegraf and this documentation. To find support, use the following resources:
Customers with an annual or support contract can contact InfluxData Support.