
Manage settings
Telegraf Controller is in Public Beta
Telegraf Controller is in public beta and will be part of the future Telegraf Enterprise offering. While in beta, Telegraf Controller is not meant for production use. The Telegraf Controller documentation is a work in progress, and we are actively working to improve it. If you have any questions or suggestions, please submit an issue. We welcome any and all contributions.
Owners and administrators can configure authentication, login security, and password requirements for Telegraf Controller.
Navigate to the Settings page from the left navigation menu to view and modify these settings.
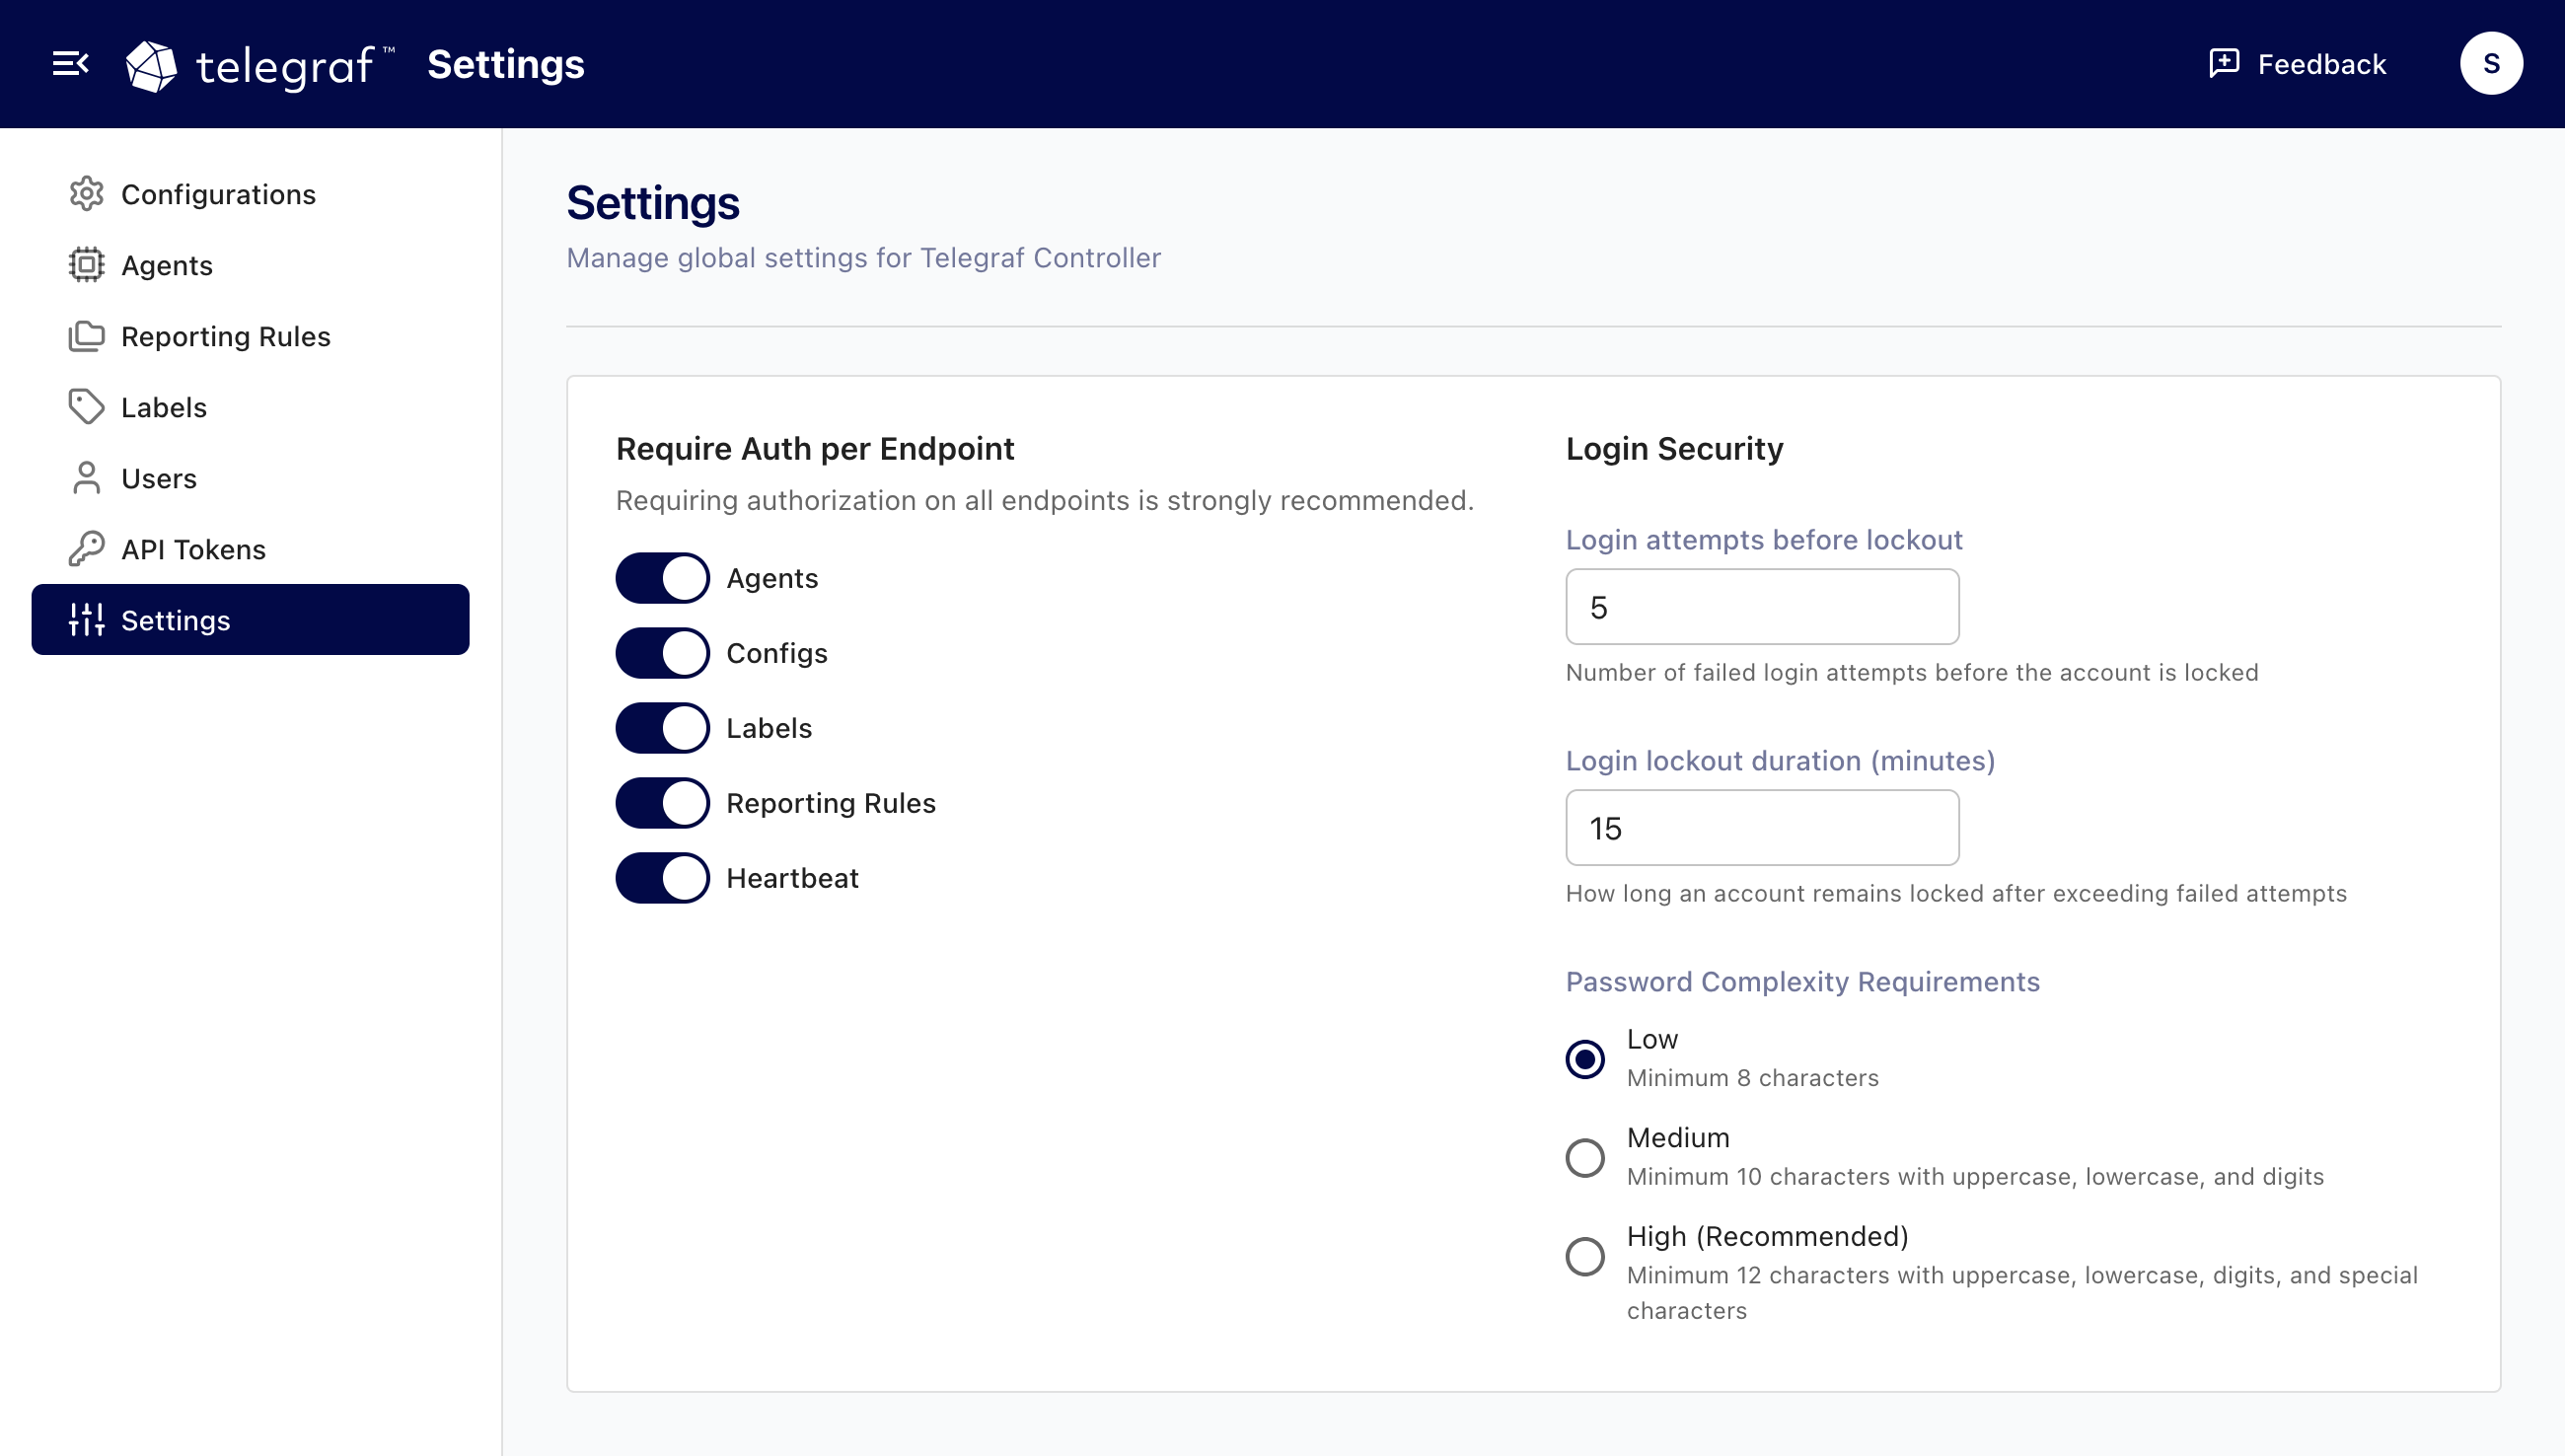
Require authentication per endpoint
Telegraf Controller organizes API endpoints into groups. Authentication can be required or disabled for each group independently, giving you fine-grained control over which resources require credentials.
| Endpoint group | Covers |
|---|---|
agents | Agent monitoring and management |
configs | Configuration management |
labels | Label management |
reporting-rules | Reporting rule management |
heartbeat | Agent heartbeat requests |
When authentication is disabled for a group, anyone with network access can use those endpoints without an API token. When enabled, requests require valid authentication.
By default, authentication is required for all endpoints.
To toggle authentication for endpoint groups:
- Navigate to the Settings page.
- Toggle authentication on or off for each endpoint group.
- Click Save.
Disabling authentication for endpoints means anyone with network access to Telegraf Controller can access those resources without credentials.
Environment variable and CLI flag
You can configure disabled authentication endpoints at startup using the
DISABLED_AUTH_ENDPOINTS environment variable or the --disable-auth-endpoints
CLI flag.
The value is a comma-separated list of endpoint groups, or "*" to disable
authentication for all endpoints.
# Disable auth for agents and heartbeat only
export DISABLED_AUTH_ENDPOINTS="agents,heartbeat"

# Disable auth for all endpoints
export DISABLED_AUTH_ENDPOINTS="*"
Using the CLI flag:
# Disable auth for agents and heartbeat only
./telegraf_controller --disable-auth-endpoints=agents,heartbeat

# Disable auth for all endpoints
./telegraf_controller --disable-auth-endpoints="*"
These values are used as initial defaults when Telegraf Controller creates its settings record for the first time. After that, changes made through the Settings page take precedence.
Login security
Login attempts
You can configure the number of failed login attempts allowed before an account is locked out. The default threshold is 5 attempts, with a minimum of 1.
To change the login attempt threshold:
- Navigate to the Settings page.
- Update the Login attempts value.
- Click Save.
Login lockout
When a user exceeds the failed attempt threshold, their account is locked for a configurable duration. The default lockout duration is 15 minutes, with a minimum of 1 minute. The lockout clears automatically after the configured duration has elapsed.
To change the lockout duration:
- Navigate to the Settings page.
- Update the Login lockout duration value.
- Click Save.
If a user is locked out, an owner or administrator can reset their password to unlock the account.
Password complexity requirements
Telegraf Controller provides three password complexity levels that apply to all password operations, including initial setup, password changes, password resets, and invite completion.
| Level | Min length | Uppercase* | Lowercase* | Digits* | Special characters* |
|---|---|---|---|---|---|
| Low | 8 | No | No | No | No |
| Medium | 10 | Yes | Yes | Yes | No |
| High | 12 | Yes | Yes | Yes | Yes |
* Passwords require at least one of the defined character types.
To change the password complexity level:
- Navigate to the Settings page.
- Select the desired Password complexity level.
- Click Save.
Changing the password complexity level does not affect existing passwords. The new requirements apply only when users set or change their passwords.
Environment variables
You can set initial defaults for login security settings using environment variables. These values are applied when Telegraf Controller initializes its settings for the first time. Changes made on the Settings page override initialized settings.
| Environment variable | Description | Default |
|---|---|---|
LOGIN_LOCKOUT_ATTEMPTS | Failed attempts before lockout | 5 |
LOGIN_LOCKOUT_MINUTES | Minutes to lock account | 15 |
PASSWORD_COMPLEXITY | Complexity level (low, medium, high) | low |
Was this page helpful?
Thank you for your feedback!
Support and feedback
Thank you for being part of our community! We welcome and encourage your feedback and bug reports for Telegraf and this documentation. To find support, use the following resources:
Customers with an annual or support contract can contact InfluxData Support.