
Use Telegraf configurations
Telegraf Controller is in Public Beta
Telegraf Controller is in public beta and will be part of the future Telegraf Enterprise offering. While in beta, Telegraf Controller is not meant for production use. The Telegraf Controller documentation is a work in progress, and we are actively working to improve it. If you have any questions or suggestions, please submit an issue. We welcome any and all contributions.
Use Telegraf Controller to centralize management of your Telegraf configurations and keep your agents consistent across environments. Apply the configuration by pointing your agents to the configuration URL.
- Apply a configuration to an agent
- Set dynamic values
- Auto-update agents
- Use Telegraf Controller to build commands
Apply a configuration to an agent
When starting a Telegraf agent, use a --config flag with the
Telegraf Controller configuration TOML API URL—for example:
telegraf \
  --config "http://localhost:8888/api/configs/xxxxxx/toml"
A single Telegraf agent can use multiple configurations.
Provide each with a distinct --config flag.
Telegraf merges the configurations at runtime.
Telegraf retrieves and validates the configuration from Telegraf Controller
and then starts the telegraf process using the loaded configuration.
Retrieve a configuration with authorization enabled
If Telegraf Controller is configured to require authentication on the Configs
API, define the INFLUX_TOKEN environment variable to authorize Telegraf
to retrieve a configuration:
export INFLUX_TOKEN=YOUR_TC_API_TOKEN

telegraf \
  --config "http://telegraf_controller.example.com/api/configs/xxxxxx/toml
Replace YOUR_TC_API_TOKEN
with your Telegraf Controller API token. This token must have read
permissions on the Configs API.
Set dynamic values
Telegraf and Telegraf Controller let you dynamically set values in your configuration files using parameters, environment variables, and secrets.
Set parameter values
Configuration parameters
use the &{param_name[:default_value]} syntax in TOML configurations. Use
URL-encoded query parameters in your configuration URL to define parameter
values—for example:
Configuration TOML with a parameter
[[outputs.heartbeat]]
  instance_id = "&{agent_id}"
  # ...
Set the parameter value in the configuration URL
telegraf \
  --config "http://localhost:8888/api/configs/xxxxxx/toml?agent_id=my-agent-123"
If you request a configuration without providing values for required parameters, Telegraf Controller returns an error.
Set environment variables
Telegraf environment variables
use the ${VAR_NAME[:-default_value]} syntax in TOML configurations. Set
environment variable values in the Telegraf agent’s environment before
starting Telegraf—for example:
Configuration TOML with an environment variable
[[inputs.http]]
  urls = ["http://localhost:8080/metrics"]

  [inputs.http.headers]
    Authorization = "Bearer ${AUTH_TOKEN}"
Set the environment variable before starting Telegraf
AUTH_TOKEN=x00x0xx00xxxX0xXXx0000xxxX000x00XXxXx

telegraf \
  --config "http://localhost:8888/api/configs/xxxxxx/toml"
Auto-update agents
For agents to automatically recognize and load updates to their
configuration, include the --config-url-watch-interval with a duration value
that specifies how often the agent should check for updates—for example:
telegraf \
  --config https://locahost:8888/api/configs/xxxxxx/toml \
  --config-url-watch-interval 1h
In this example, the agent will check for configuration changes every hour and automatically reload the configuration if the configuration has been updated.
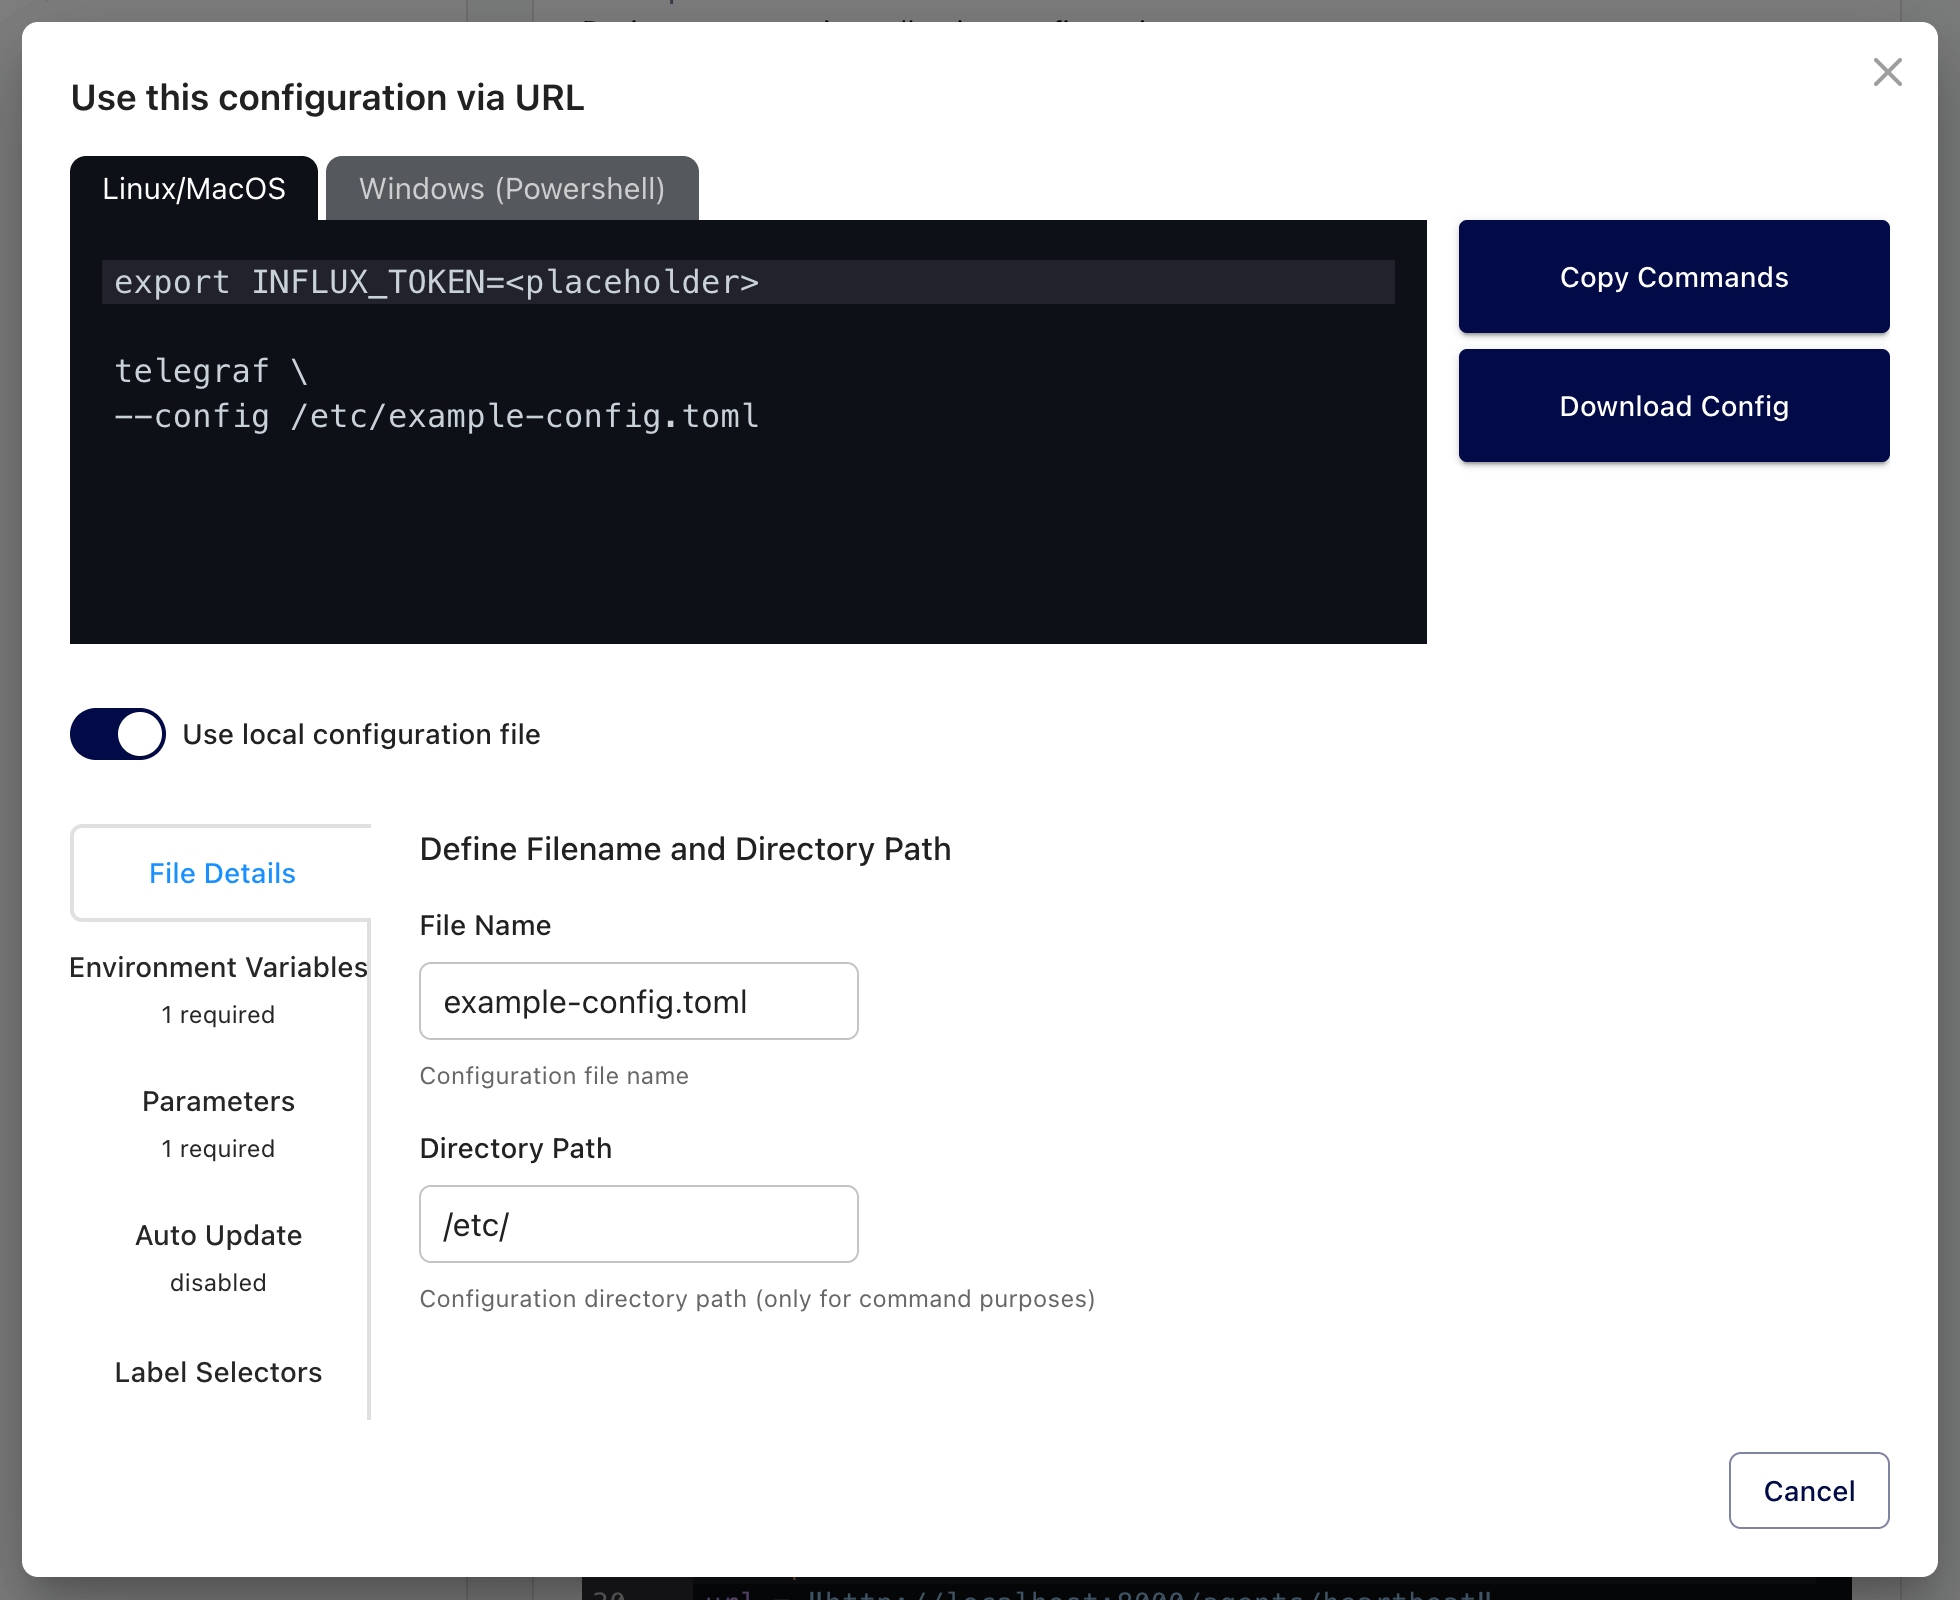
Use Telegraf Controller to build commands
Telegraf Controller provides a tool for building telegraf commands using
parameters, environment variables, auto-update functionality, and Telegraf
label selectors. To use this tool:
In the Telegraf Controller web interface, select Configurations in the navigation bar.
Click the name of the configuration you want to use.
Click Use this Configuration to open the modal window.

Optional: To download a configuration and run it from your local filesystem rather than having Telegraf retrieve it directly from Telegraf Controller, enable the Use local configuration file option. See more information below.
Define dynamic values and select options for your command:
- Set environment variable values
- Set parameter values
- Enable automatic configuration updates and specify the check interval
- Add label selectors to run certain plugins based on configuration labels
Click Copy Commands to copy the contents of the codeblock to your clipboard. The tool provides commands for Linux, macOS, and Windows (PowerShell).
Some browsers restrict copying to clipboard
Your browser may not allow the Copy Commands button to copy to your clipboard under the following conditions:
- You’re using an IP or domain name other than
0.0.0.0orlocalhostand - You’re using HTTP, not HTTPS
- You’re using an IP or domain name other than
Download a configuration to your local filesystem
With the Use local configuration file option enabled in the command builder, Telegraf Controller lets you configure the directory path and file name to use for the configuration.
Define dynamic values and select options for your command:
- Set file details
- Set environment variable values
- Set parameter values
- Enable automatic configuration updates and specify the check strategy
- Add label selectors to run certain plugins based on configuration labels
Click Download Config to download the configuration to your local machine. The downloaded TOML files uses the file name specified in the File Details tab and includes all the specified parameter replacements.
Click Copy Commands to copy the contents of the codeblock to your clipboard. The tool provides commands for Linux, macOS, and Windows (PowerShell). See information about copying to your clipboard.
Was this page helpful?
Thank you for your feedback!
Support and feedback
Thank you for being part of our community! We welcome and encourage your feedback and bug reports for Telegraf and this documentation. To find support, use the following resources:
Customers with an annual or support contract can contact InfluxData Support.