---
title: Create a custom role
description: Create a custom role in the InfluxDB 3 Cloud Admin UI, grant it permissions, assign it to users, and edit or delete it.
url: https://docs.influxdata.com/influxdb3/cloud/admin/users/create-custom-role/
estimated_tokens: 1241
product: InfluxDB 3 Cloud
version: cloud
publisher: InfluxData
canonical: https://docs.influxdata.com/influxdb3/cloud/admin/users/create-custom-role/
date: '2026-11-06T09:39:16-05:00'
lastmod: '2026-11-06T09:39:16-05:00'
---
Use the Admin UI to create a custom role, grant it permissions, and assign it to
users.
To create and edit roles, you need the **Manage** permission on **Roles**.
The **Admin** role includes this permission.
* [Create a role](#create-a-role)
* [Grant permissions](#grant-permissions)
* [Assign a role to users](#assign-a-role-to-users)
* [Edit a role](#edit-a-role)
* [Delete a role](#delete-a-role)
## Create a role
1. Go to [console.influxdata.com](https://console.influxdata.com) and sign in.
2. In the navigation, under **Account**, select **Roles**.
3. Click **Create role**.
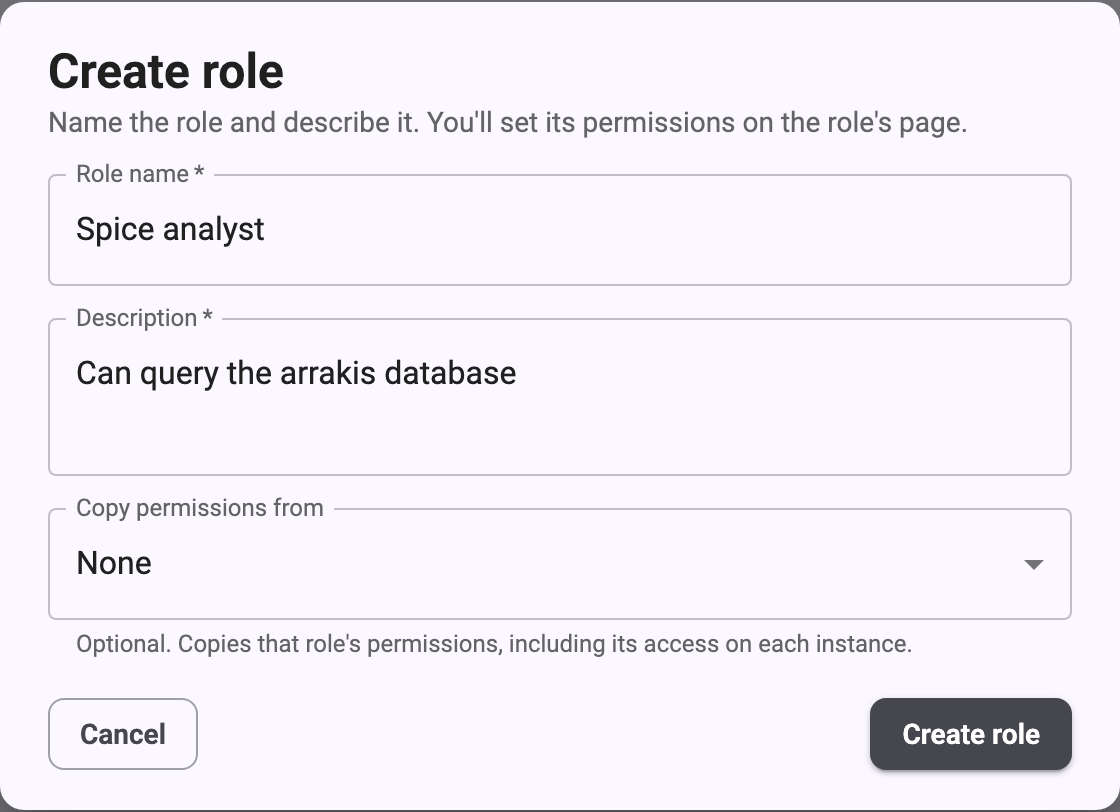
4. In the **Create role** dialog, enter the following:
* **Role name**: A name that’s unique in the account.
* **Description**: What the role is for.
* **Copy permissions from**: *Optional.* To start from an existing role’s
permissions, including its access on each instance, select that role.
Otherwise, select **None**.
5. Click **Create role**.
The role’s page opens.
It shows the role’s **Account permissions**, **Instance permissions**, and**Users**.
For example, the following dialog creates a role for users who query the`arrakis` database:
 For name and description limits, see[Role limits](/influxdb3/cloud/admin/users/roles/#role-limits).
## Grant permissions
A new role starts with no permissions unless you copied them from another role.
For a description of each permission, see the[permissions reference](/influxdb3/cloud/admin/users/permissions/).
1. On the role’s page, click **Edit**.
2. Under **Account permissions**, select the permissions that apply to the whole
account.
3. Under **Instance permissions**, find the instance you want to grant access to.
4. Under **Instance-wide**, select the token and system endpoint permissions.
5. Under **Database permissions**, do one or both of the following:
* To grant access to every database on the instance, including databases
created later, select permissions in the **All databases** row.
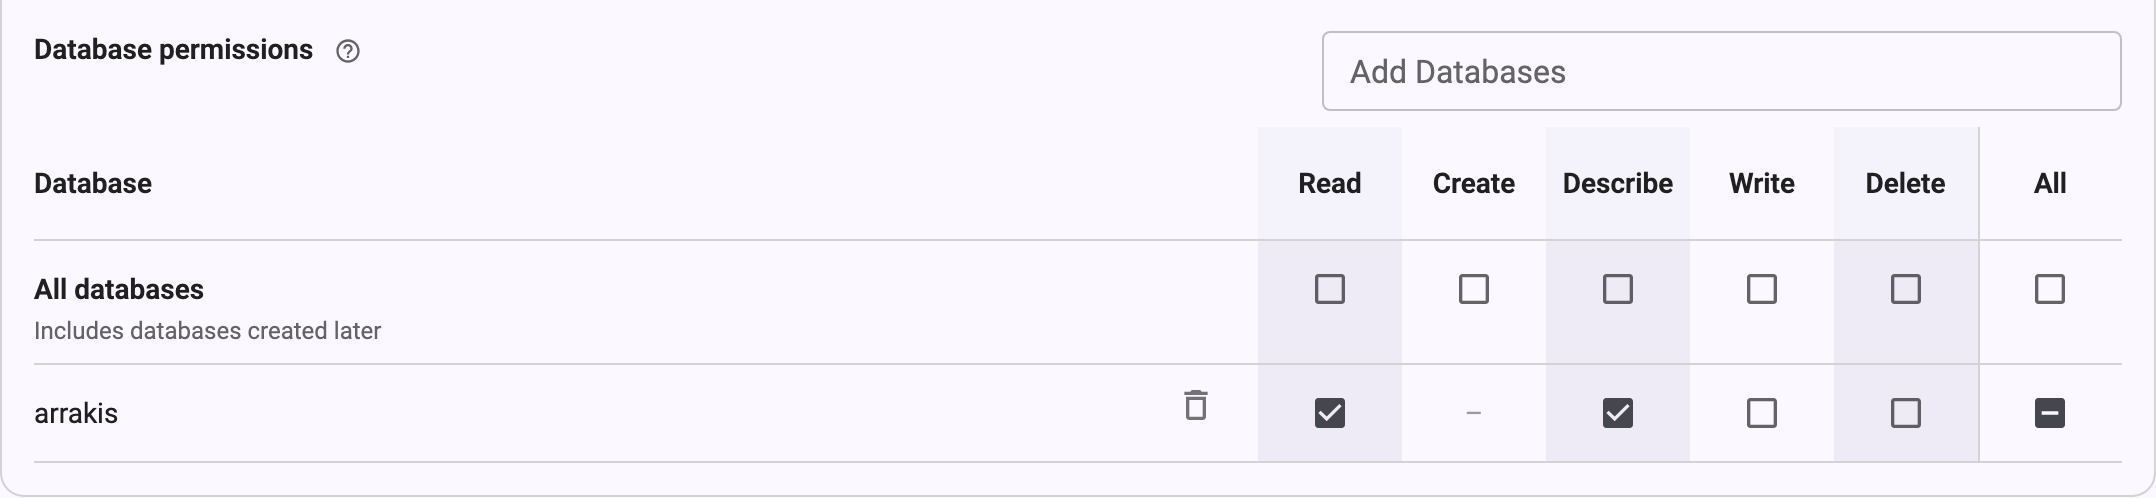
* To grant access to specific databases, select each database in the**Add Databases** field, and then select permissions in its row.
6. Click **Save changes**.
7. Review the summary of changes, and then click **Save changes** to confirm.
To go back without saving, click **Keep editing**.
For example, the following permissions let users query the `arrakis` database.**Read** lets them query the database, and **Describe** lets them list the
database and view its schema:
 > [!Warning]
> #### Token permissions can exceed a role’s database access
>
> A user who can create resource tokens can create a token with broader database
> access than their role grants.
> Only grant **Create** on **Resource tokens** to users you trust with that access.
## Assign a role to users
1. On the role’s page, in the **Users** section, click **Edit users**.
2. Select the users to give this role.
To remove the role from a user, clear the selection for that user.
3. Click **Save users**.
Changes to a role’s users apply as soon as you save them.
If you’re editing the role’s permissions, save or discard those changes first.
You can also assign roles when you [invite a user](/influxdb3/cloud/admin/users/admin-ui/#invite-a-user)or [change a user’s roles](/influxdb3/cloud/admin/users/admin-ui/#change-a-users-roles)on the **Users** page.
> [!Note]
> A user must hold at least one role.
> To remove a user’s only role, give them another role first.
## Edit a role
1. In the navigation, under **Account**, select **Roles**, and then select the
role.
2. Click **Edit**.
3. Change the role’s name, description, or permissions.
4. Click **Save changes**, review the summary, and then click **Save changes** to
confirm.
To cancel your edits, click **Discard**.
Permission changes apply immediately to everyone who holds the role.
You can’t edit the **Admin** role.
> [!Note]
> You can only change a role’s access on an instance that’s available.
> If an instance is starting or deleted, its permissions are read-only.
## Delete a role
1. In the navigation, under **Account**, select **Roles**, and then select the
role.
2. At the bottom of the role’s page, click **Delete this role**.
3. Confirm the deletion.
Deleting a role can’t be undone.
Users who hold the role lose its access, and keep any other roles they hold.
You can’t delete the **Admin** role.
#### Related
* [Understand roles](/influxdb3/cloud/admin/users/roles/)
* [Role permissions reference](/influxdb3/cloud/admin/users/permissions/)
* [Manage users in the Admin UI](/influxdb3/cloud/admin/users/admin-ui/)