
Create a custom role
Use the Admin UI to create a custom role, grant it permissions, and assign it to users.
To create and edit roles, you need the Manage permission on Roles. The Admin role includes this permission.
Create a role
Go to console.influxdata.com and sign in.
In the navigation, under Account, select Roles.
Click Create role.
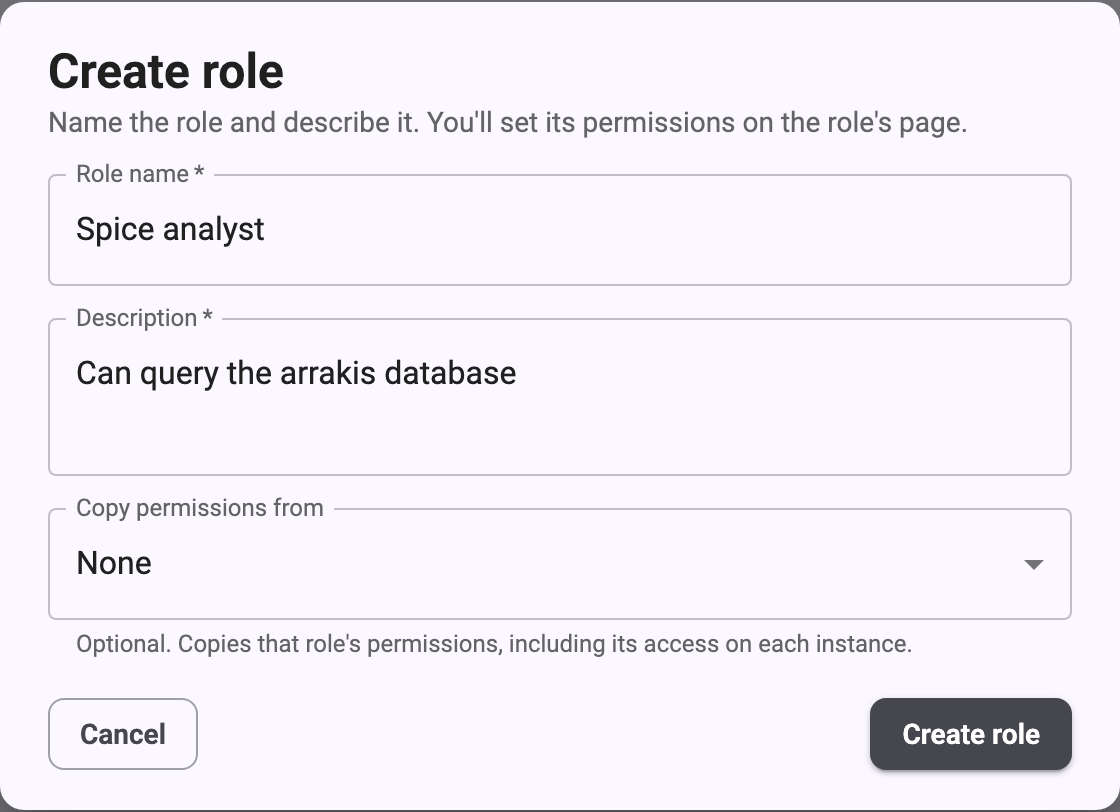
In the Create role dialog, enter the following:
- Role name: A name that’s unique in the account.
- Description: What the role is for.
- Copy permissions from: Optional. To start from an existing role’s permissions, including its access on each instance, select that role. Otherwise, select None.
Click Create role.
The role’s page opens. It shows the role’s Account permissions, Instance permissions, and Users.
For example, the following dialog creates a role for users who query the
arrakis database:
For name and description limits, see Role limits.
Grant permissions
A new role starts with no permissions unless you copied them from another role. For a description of each permission, see the permissions reference.
On the role’s page, click Edit.
Under Account permissions, select the permissions that apply to the whole account.
Under Instance permissions, find the instance you want to grant access to.
Under Instance-wide, select the token and system endpoint permissions.
Under Database permissions, do one or both of the following:
- To grant access to every database on the instance, including databases created later, select permissions in the All databases row.
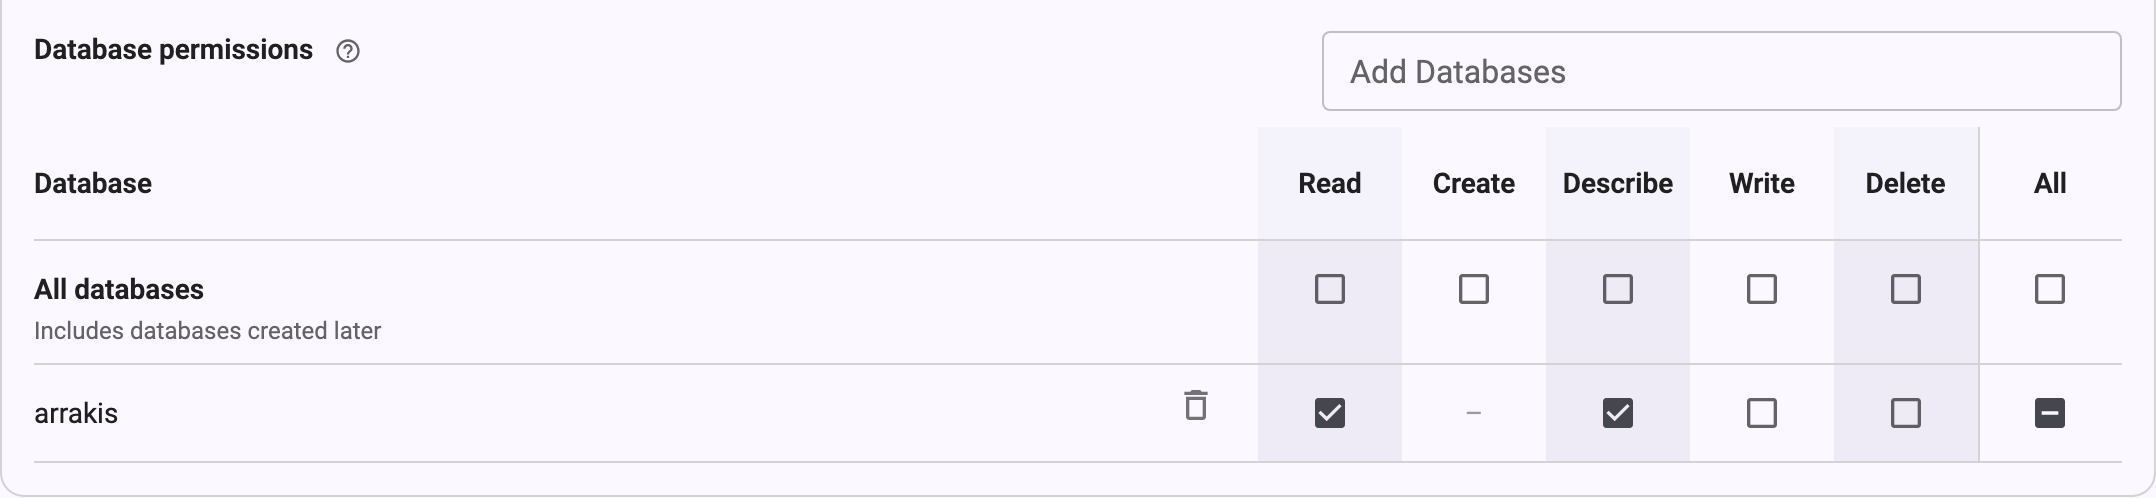
- To grant access to specific databases, select each database in the Add Databases field, and then select permissions in its row.
Click Save changes.
Review the summary of changes, and then click Save changes to confirm. To go back without saving, click Keep editing.
For example, the following permissions let users query the arrakis database.
Read lets them query the database, and Describe lets them list the
database and view its schema:
Token permissions can exceed a role’s database access
A user who can create resource tokens can create a token with broader database access than their role grants. Only grant Create on Resource tokens to users you trust with that access.
Assign a role to users
- On the role’s page, in the Users section, click Edit users.
- Select the users to give this role. To remove the role from a user, clear the selection for that user.
- Click Save users.
Changes to a role’s users apply as soon as you save them. If you’re editing the role’s permissions, save or discard those changes first.
You can also assign roles when you invite a user or change a user’s roles on the Users page.
A user must hold at least one role. To remove a user’s only role, give them another role first.
Edit a role
- In the navigation, under Account, select Roles, and then select the role.
- Click Edit.
- Change the role’s name, description, or permissions.
- Click Save changes, review the summary, and then click Save changes to confirm. To cancel your edits, click Discard.
Permission changes apply immediately to everyone who holds the role.
You can’t edit the Admin role.
You can only change a role’s access on an instance that’s available. If an instance is starting or deleted, its permissions are read-only.
Delete a role
- In the navigation, under Account, select Roles, and then select the role.
- At the bottom of the role’s page, click Delete this role.
- Confirm the deletion.
Deleting a role can’t be undone. Users who hold the role lose its access, and keep any other roles they hold.
You can’t delete the Admin role.
Was this page helpful?
Thank you for your feedback!
Support and feedback
Thank you for being part of our community! We welcome and encourage your feedback and bug reports for InfluxDB 3 Cloud and this documentation. To find support, use the following resources:
Customers with an annual or support contract can contact InfluxData Support.