
Manage users in the Admin UI
Use the InfluxDB 3 Cloud Admin UI to manage users and control access to your instance through a web-based interface. The Admin UI provides self-service user management, allowing administrators to invite new users, assign roles, and manage invitations.
- Access the Users page
- View existing users
- Invite a user
- Manage invitations
- User roles and permissions
- Manage users
- Limitations
Access the Users page
Access the InfluxDB 3 Cloud Admin UI at console.influxdata.com. If you don’t have login credentials, contact InfluxData support.
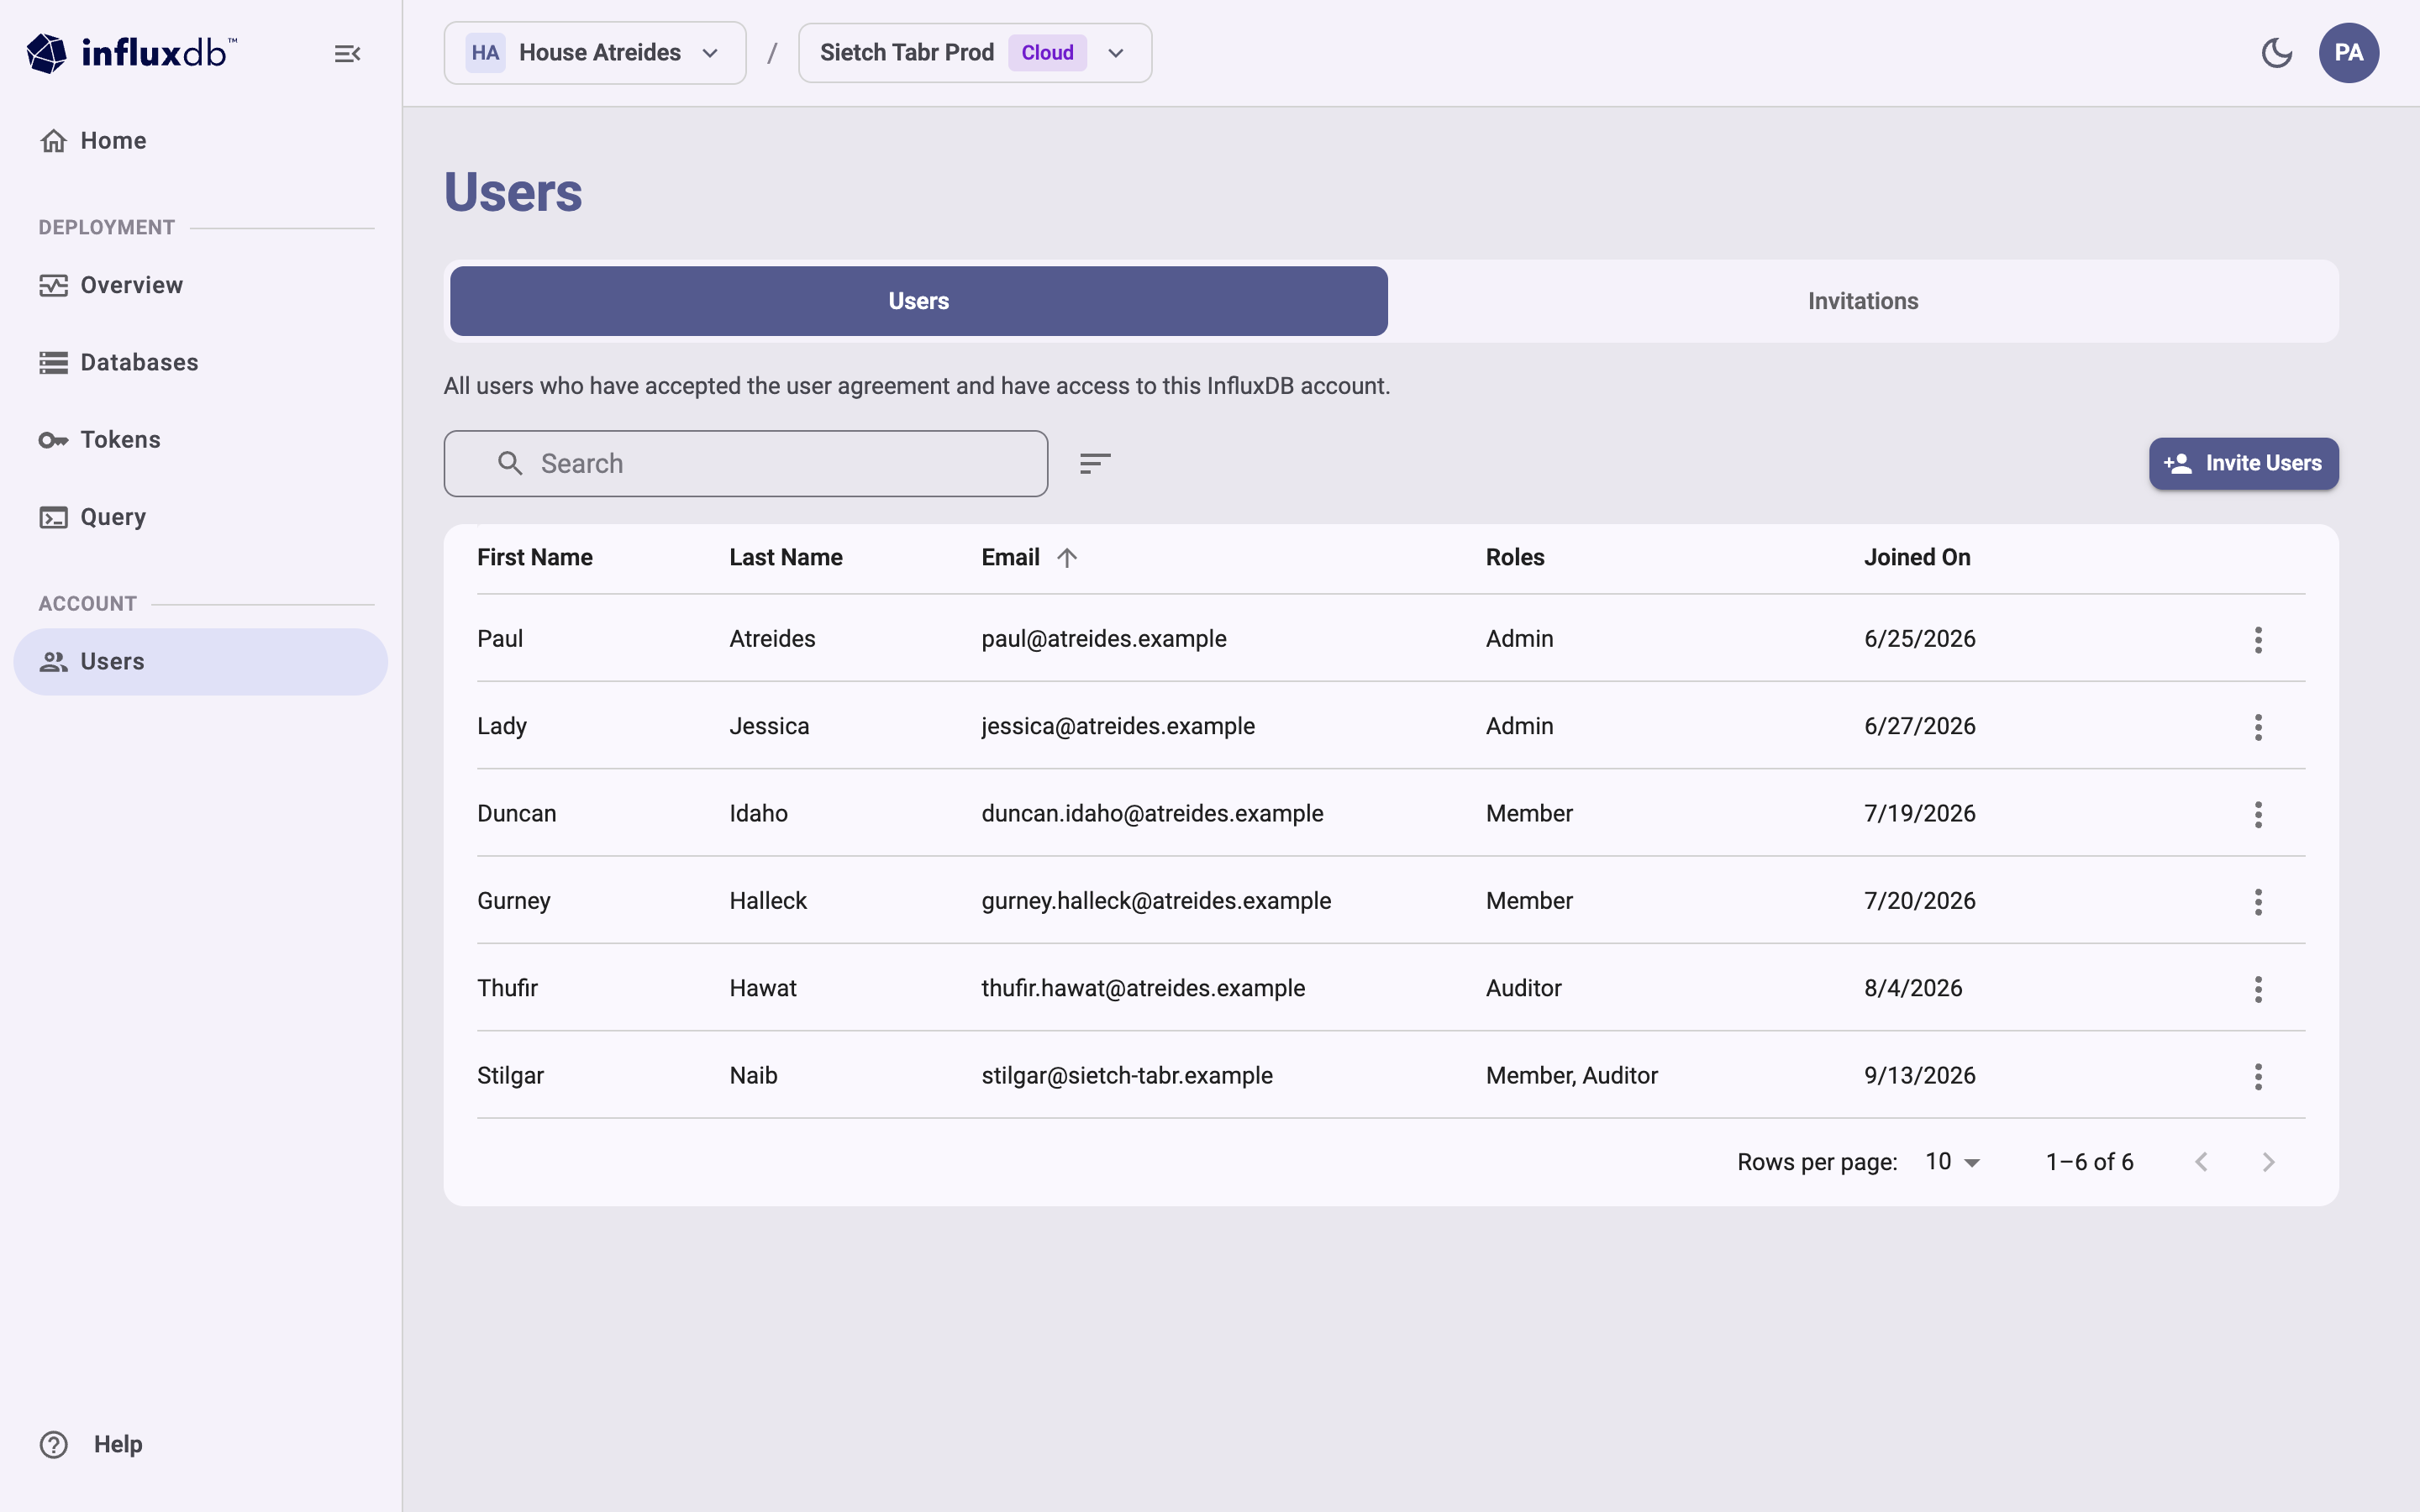
The Users page displays your account information and a table of existing users and invitations. Use it to manage access to your InfluxDB account:
- View all users who have accepted the user agreement and have access to the account
- Invite new users to the account
- View user roles, email addresses, and join dates
- Manage user permissions and access
- Toggle between Users and Invitations tabs
View existing users
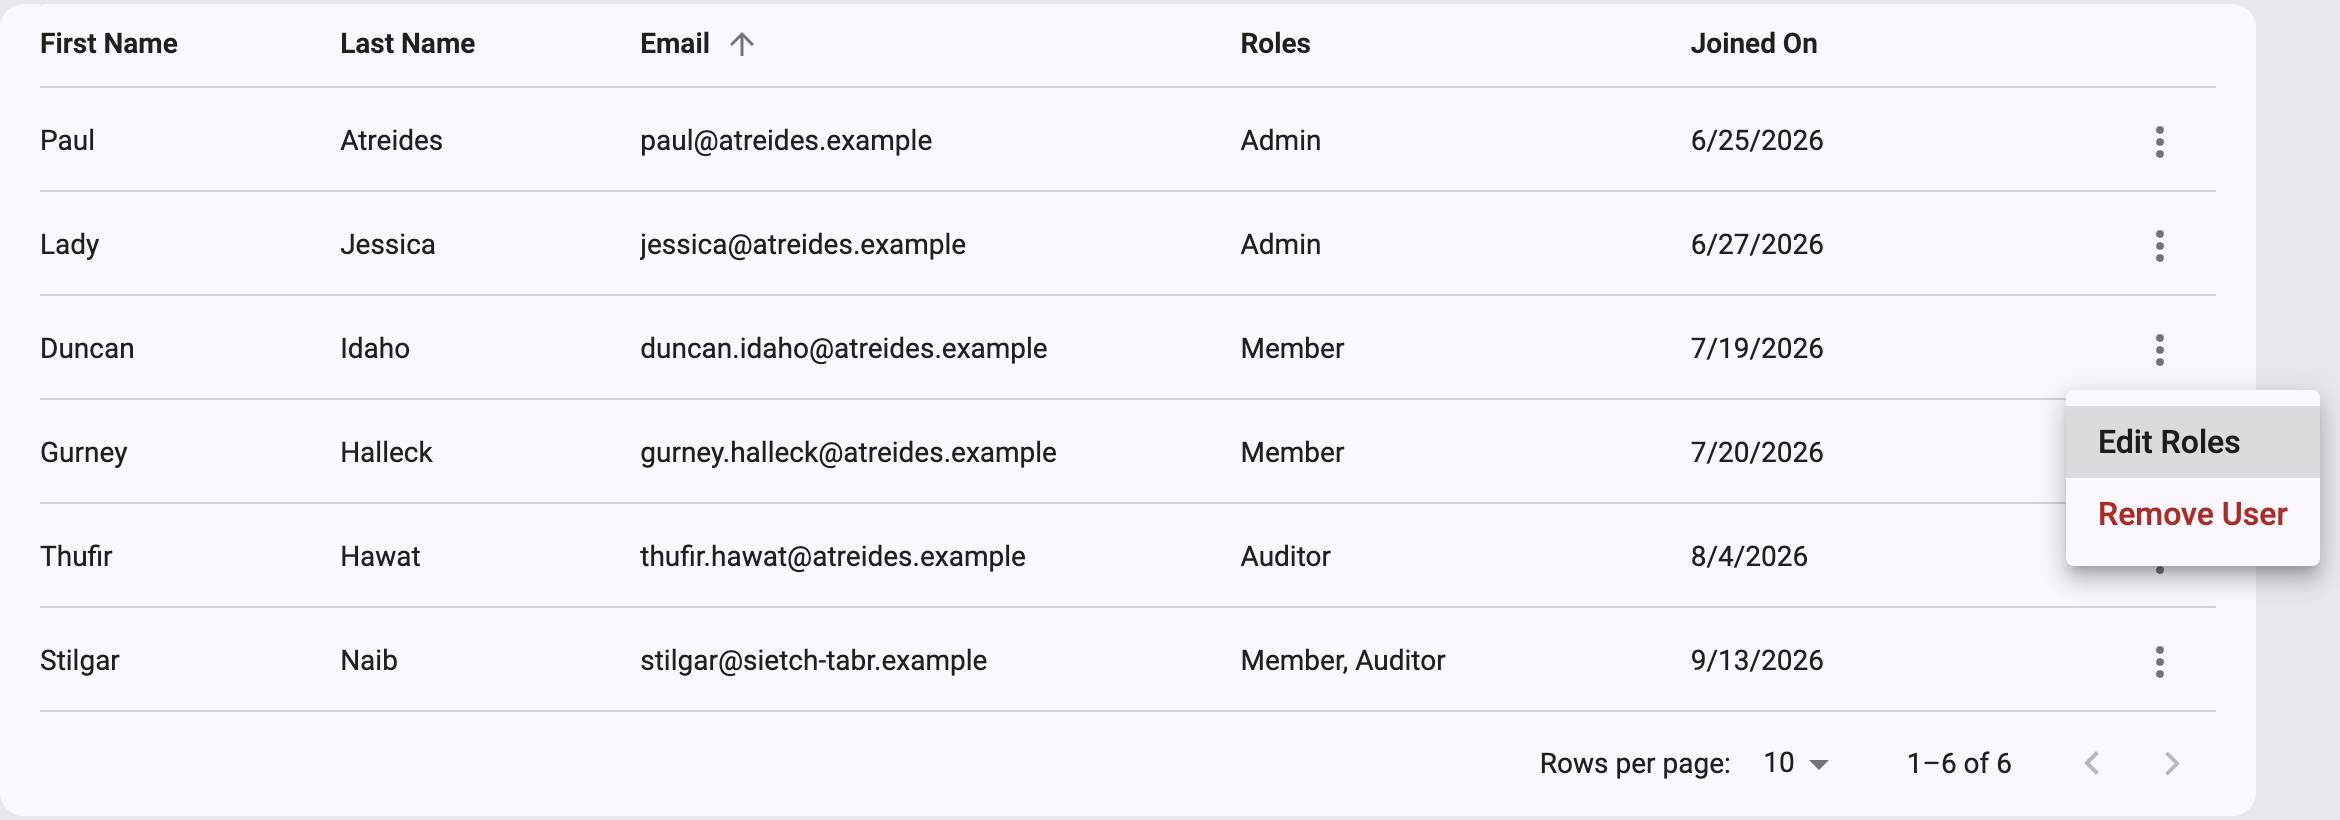
The Users tab lists users who have accepted the user agreement and have access to the account. It displays the following information:
- First Name and Last Name
- Roles
- Joined On
- An Actions menu for each user
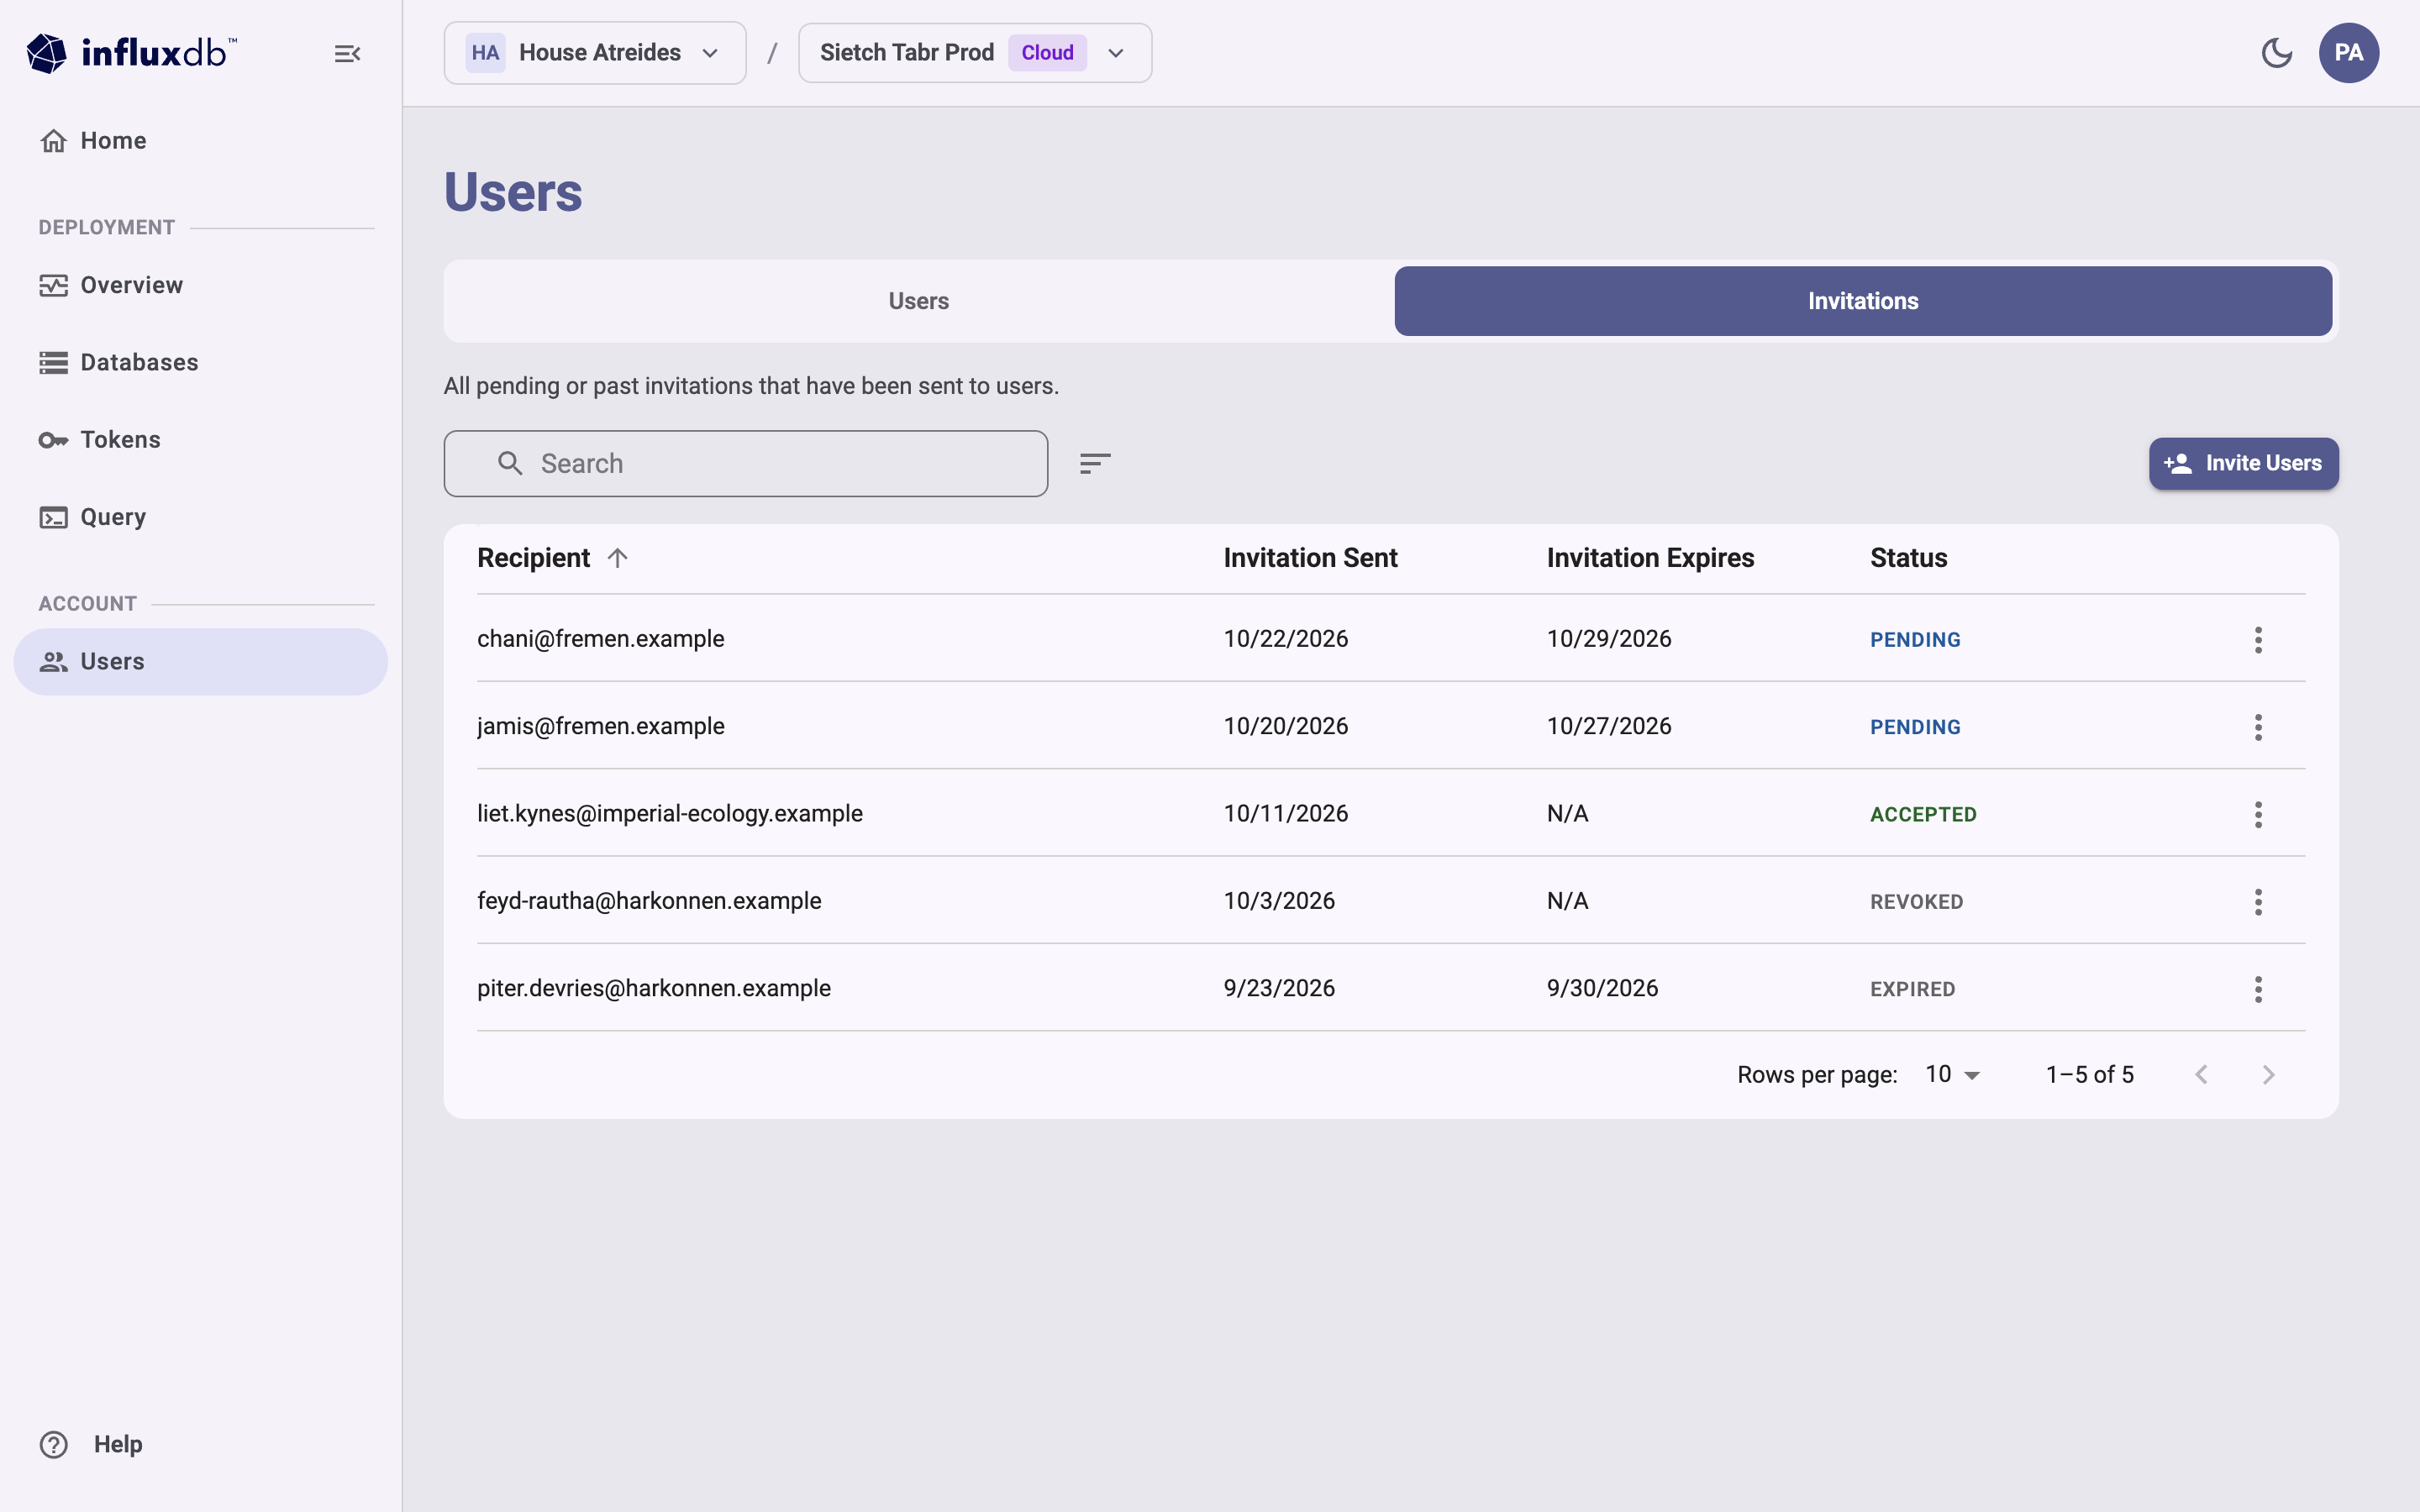
To view invitations, select Invitations. The Invitations tab displays the following information:
- Recipient
- Status (
Pending,Accepted,Revoked, orExpired) - Invitation Sent
- Invitation Expires
- An Actions menu for each invitation
Invite a user
To send invitations, you need the Manage permission on Invitations. The Admin role includes this permission.
- On the Users page, click Invite Users.
- In the Invite User dialog:
- Enter the email address of the user you want to invite
- In the Roles list, select one or more roles, including any
custom roles.
You must select at least one role to send the invitation.
- Admin: Full management of account resources and users
- Member: Database access and database token management
- Auditor: Read-only access to account resources
- Click Send Invitation.
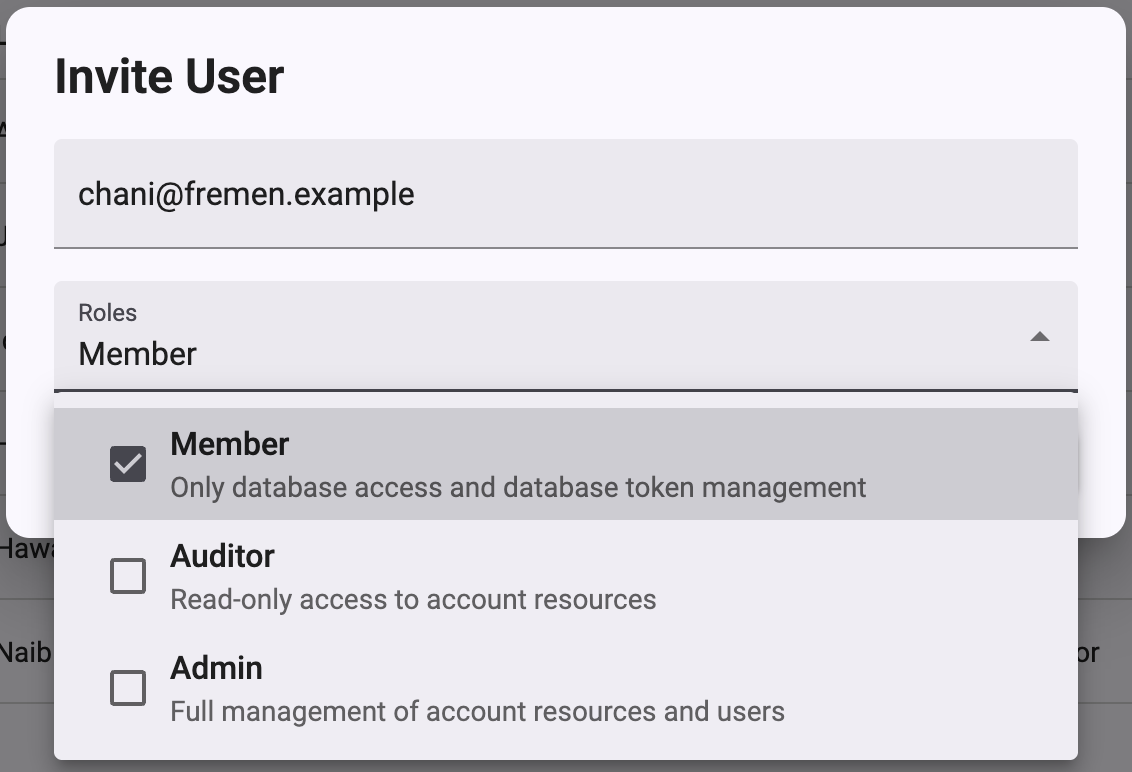
An invitation email with an activation link is sent to the specified email address. The user must accept the invitation to gain access to your InfluxDB 3 Cloud instance.
To accept, the invitee signs in or signs up with the invited email address, enters a First Name and Last Name, accepts the subscription terms, and then selects Join Account.
Invitation expiration
Invitations expire after 7 days. If an invitation expires, send a new invitation to the user.
Manage invitations
Revoke an invitation
You can revoke pending invitations that haven’t been accepted yet:
- Select the Invitations tab.
- Locate the invitation you want to revoke.
- Click the Actions menu (three vertical dots) for that invitation.
- Select Revoke Invitation.
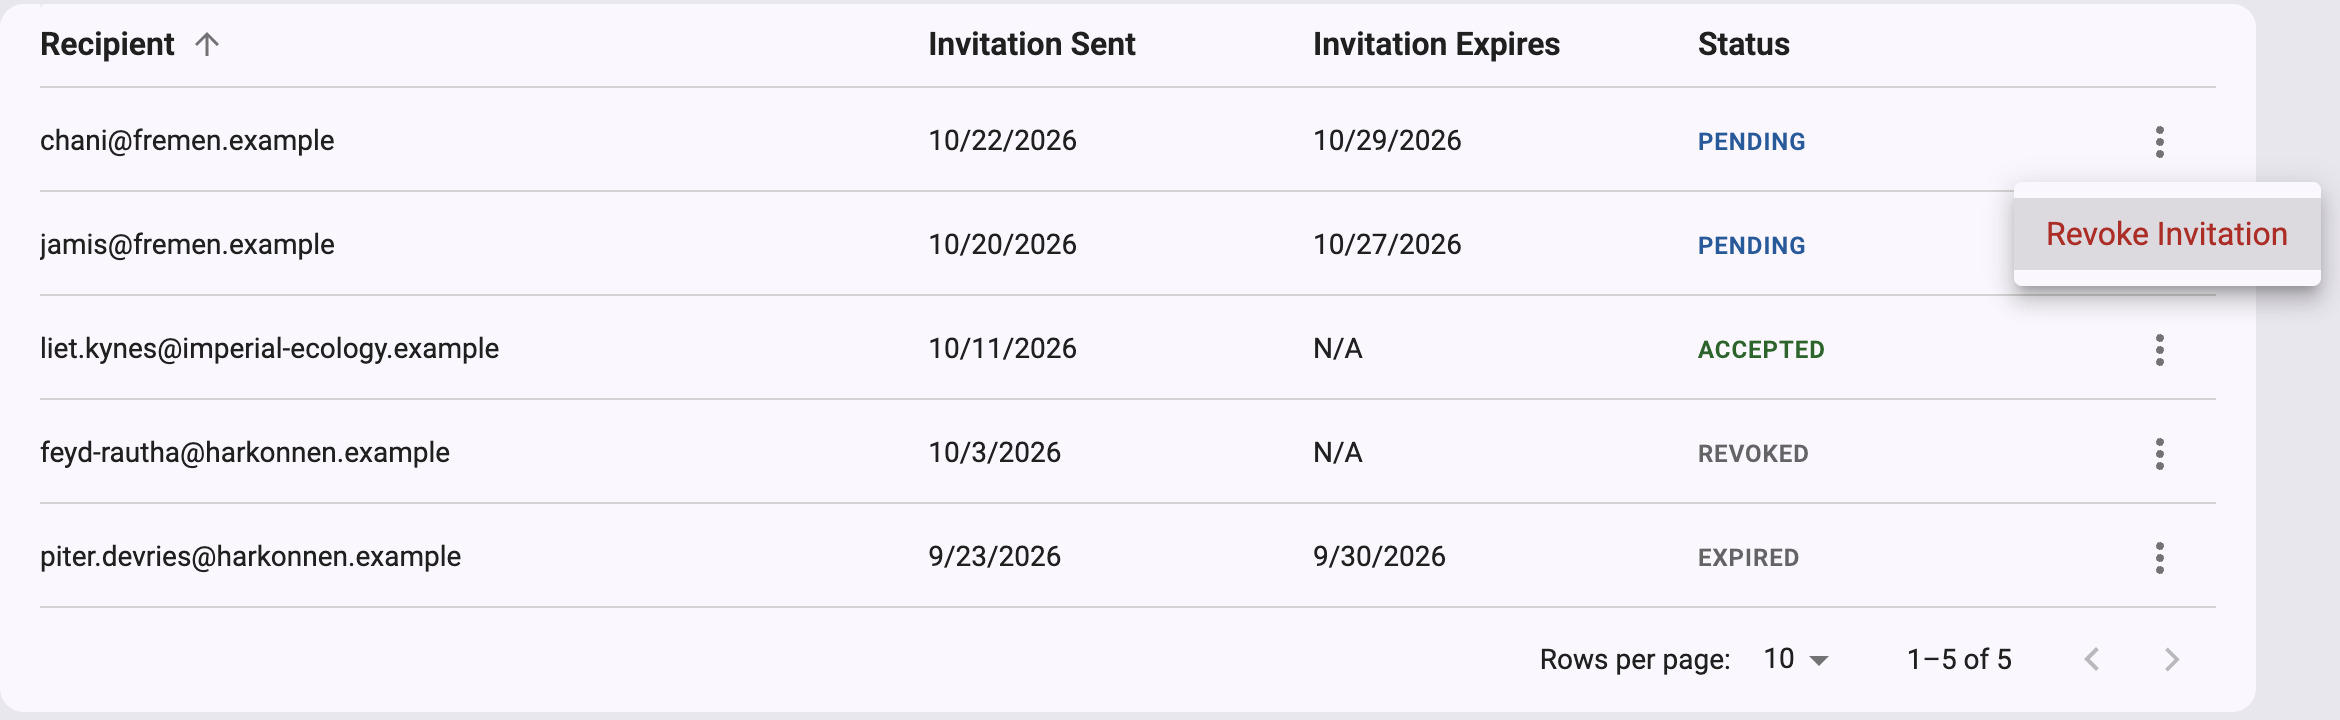
The revocation takes effect immediately, without a confirmation prompt.
Revoked invitations can no longer be used to access your instance.
The invitation status changes to Revoked.
User roles and permissions
InfluxDB 3 Cloud uses role-based access control to manage user permissions. Every account starts with the Admin, Member, and Auditor roles, and you can create custom roles.
- To learn how roles work, see Understand roles.
- For each permission and what the default roles include, see the permissions reference.
- To create a role, see Create a custom role.
The Tokens page in the Admin UI requires the Admin role.
Other users create database tokens with the
influxdb3 CLI
(after influxdb3 auth login --oauth) or the HTTP API, if their role allows it.
Role assignment
Assign a role when inviting a user, and change a user’s roles after the invitation is accepted.
Manage users
To change a user’s roles, you need the Update permission on Account Users. To remove a user, you need the Delete permission on Account Users. The Admin role includes both permissions.
Change a user’s roles
On the Users tab, locate the user.
Click the Actions menu (three vertical dots) for that user.
Select Edit Roles.
In the Roles list, select one or more roles. A user must have at least one role.
Click Save Changes.
Remove a user
- On the Users tab, locate the user.
- Click the Actions menu (three vertical dots) for that user.
- Select Remove User.
- In the Remove User dialog, verify the displayed email address, and then click Remove User.
Limitations
- Historical records: Invitation records remain even after user removal.
Was this page helpful?
Thank you for your feedback!
Support and feedback
Thank you for being part of our community! We welcome and encourage your feedback and bug reports for InfluxDB 3 Cloud and this documentation. To find support, use the following resources:
Customers with an annual or support contract can contact InfluxData Support.